
Table of Contents (Start)
SevOne NMS 5.4 Implementation Guide
SevOne Documentation
All SevOne user documentation is available online from the SevOne Support website.
-
Enter email address and password.
-
Click Login.
-
Click the Solutions icon.
© Copyright 2015, SevOne Inc. All rights reserved. SevOne, SevOne PAS, SevOne DNC, SevOne PLA, Deep Flow Inspection, and Rethink Performance are either registered trademarks or trademarks of SevOne Inc. Other brands, product, service and company names mentioned herein are for identification purposes only and may be trademarks of their respective owners.
Introduction
The SevOne NMS software is loaded on your virtual machine or you appliance which this document will refer to as a peer from this point on. After you follow the steps in the SevOne Installation Guide to assign the peer an IP address, you are ready to use this document to get started with the SevOne application.
This document describes what you can do to have SevOne NMS discover and poll the devices in your network and what you can do to have SevOne PLA monitor the log data in your network.
Multi-Peer Implementations
The Cluster Manager provides an Integration tab to enable you to build your cluster and to add new appliances as peers into an existing cluster. See the Build Your SevOne NMS Cluster chapter in this document for details.
Install vPAS License File
Your license file is attached to the email.
-
Save the <license>.dat file to a location that is accessible by the SevOne appliance.
-
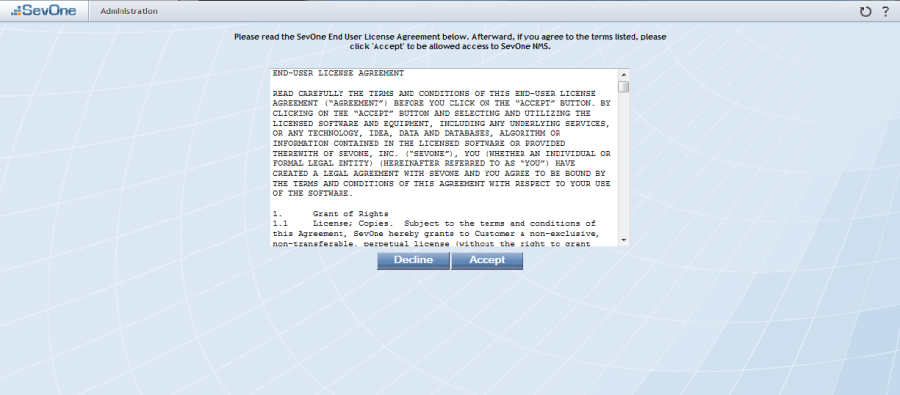
Enter the URL for the SevOne appliance into your web browser to display the license agreement.
-
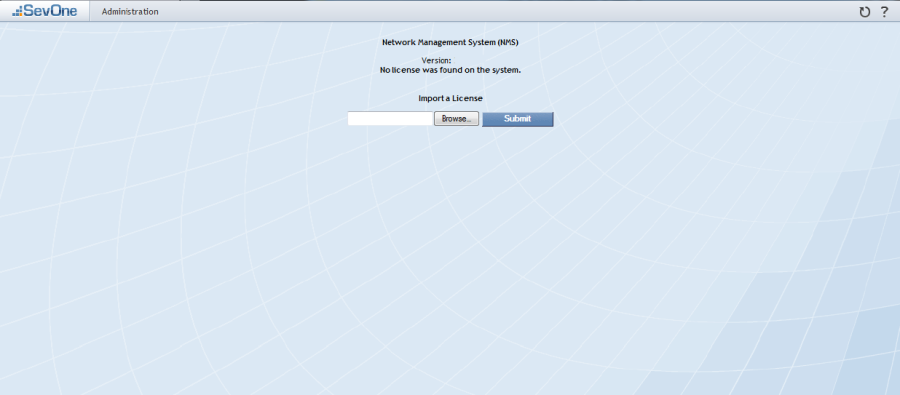
Click Accept to display the License Upload page.
-
Click Browse.
-
Navigate your file hierarchy to the license.dat file, select the <license>.dat file, and click Open.
-
Click Submit to import the license.
-
On the Finish Importing Certificate message, click OK.
-
Restart your browser.
SevOne NMS Log On
Perform the following steps to log onto your SevOne NMS appliance.
-
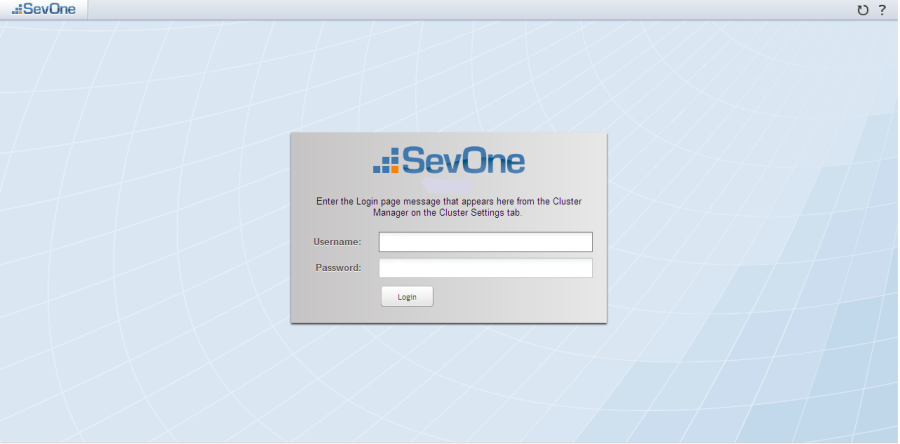
Enter the URL for the SevOne NMS appliance into your web browser to display the Login page.
-
In the Username field, enter admin.
-
In the Password field, enter SevOne (case sensitive).
-
Click Login.
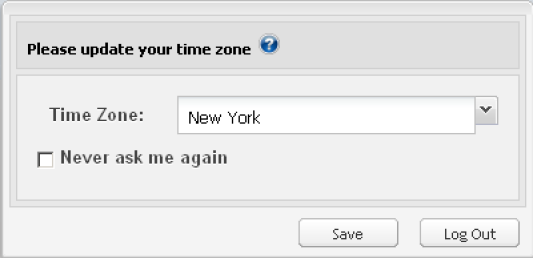
Note: The first time the admin user logs on you are prompted to set your time zone.
-
Click the Time Zone drop-down and select a time zone. If the applicable time zone does not appear in the Time Zone drop-down list, you can add time zones from the Cluster Manager (Administration > Cluster Manager > Cluster Settings >Devices).
-
Select the Never Ask Me Again check box to not see the Time Zone Setting prompt again. The Time Zone prompt does not display again even when your browser detects a time zone change.
-
Click Save.
Startup Wizard
When the admin user logs on to SevOne NMS for the first time, the Startup Wizard appears to guide you through the first initial steps to get devices you want to monitor and poll into SevOne NMS for discovery. If this is your first SevOne appliance proceed through the Startup Wizard.
Users with administration roles can access the Startup Wizard from the navigation bar, however the intent of the Startup Wizard is to help with your initial SevOne NMS implementation. All Startup Wizard workflows are duplicated within the application as noted in this document. If needed, click the Administration menu and select Startup Wizard.
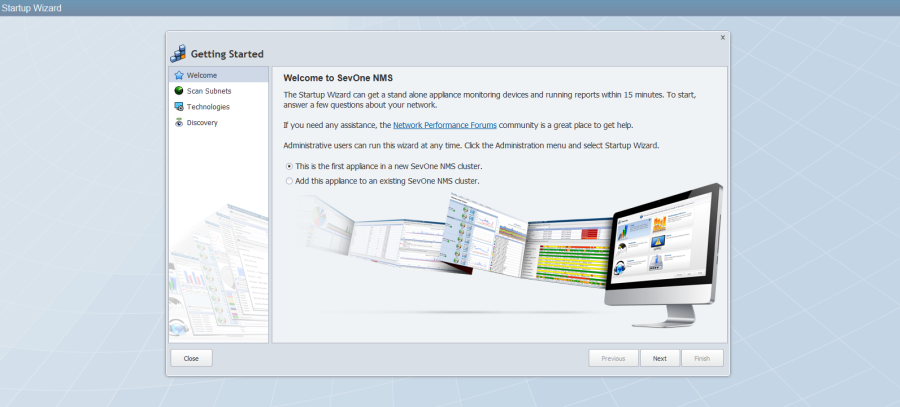
Welcome
The Welcome page on the Startup Wizard provides a link to the Network Performance Forums community where you can post questions about SevOne NMS.
First Appliance Option
To start a new SevOne NMS implementation, select the This is the first appliance in a new SevOne NMS cluster option and click Next to display the Scan Subnets page on the Startup Wizard.
Existing Cluster Option
If you intend to add this appliance as a new peer in an existing cluster, DO NOT ADD DEVICES TO THIS APPLIANCE until after you add this appliance to your cluster. There is no way to combine the device databases of non-clustered/non-peered appliances.
-
Select the Add this appliance to an existing SevOne NMS cluster option and click Next to access the Cluster Manager Integration tab. See the Build Your SevOne NMS Cluster chapter.
-
Use the Device Mover to move devices to the new peer after you add the appliance as a new peer in the cluster.
Scan Subnets
The Scan Subnets wizard page enables you to create IP address ranges and subnet blocks to scan your network for items that can be pinged. Anything SevOne NMS can ping is a candidate. Candidates you add as devices to SevOne NMS send data and are polled by SevOne NMS for metrics that are used in reports and for alerts etc.
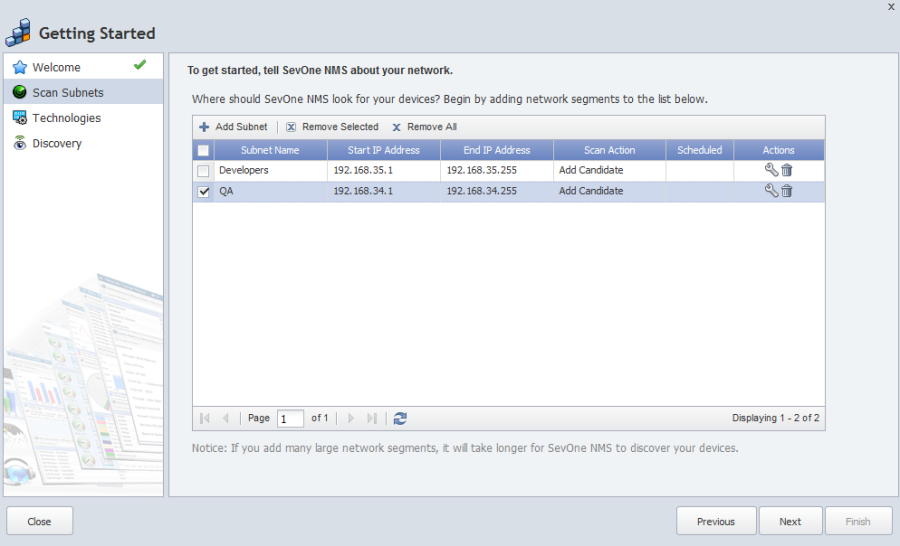
All subnets you create are scanned when you click Finish on the Startup Wizard. The Device Manager displays the devices from which data is polled and entries you make on this wizard page are duplicated on the Discovery Manager – Watched Subnets tab.
-
Click Add Subnet to display the Add Subnet pop-up.
-
In the Subnet Name field, enter the name of the IP Address range or subnet block.
-
Click the Peer drop-down.
Note: For a brand new cluster upon the very first logon, this appliance should be the only peer in the list.
If you are building a brand new multi-peer SevOne NMS cluster there are two approaches. See the Build Your SevOne Cluster chapter. -
Click the Action drop-down.
-
Select Add Device to add everything that is able to be pinged to the Device Manager for object discovery and data polling. The Discovery Action column in the subnets list displays Add Device.
-
Select Add Candidate to add everything that is able to be pinged to the Discovery Manager – Candidates tab from where you select specific candidates to add to the Device Manager. No data is collected from candidates and the Discovery Action column displays Add Candidate.
-
-
Select the Check SNMP check box to validate that the device/candidate is enabled to send SNMP data to SevOne NMS.
-
Click Schedule to display the Scan time pop-up.
-
Click the Days tabs to scan the network on the dates that appear with a darker shade. Click Weekends to scan on weekends and/or click Weekdays to scan on weekdays.
-
Click the Time Zone drop-down and select a time zone.
-
Click the Start Time drop-down and select the time to start the scan.
-
Click Add to add the scan time to the Selected list.
-
Repeat the scan time steps to add additional scan times. Each scan time must be unique.
-
Click Save to save the Scan Time and close the pop-up.
-
-
To create an IP address range, select the IP Address Range option.
-
In the Start IP Address field, enter the low end of the IP address range.
-
In the End IP Address field, enter the high end of the IP address range.
-
-
To create a subnet block, select the Subnet Block option.
-
In the IP Address field, enter an IP address.
-
In the Subnet Mask field, enter a subnet mask.
-
-
Select the Create Device Group for Subnet check box to create a device group for the devices you add to SevOne NMS as a result of the scan for the subnet.
-
Click Add to add the block or range to the list to watch.
-
Repeat the previous steps to create additional ranges.
-
Click Next.
Technologies
When you enable devices to send data to SevOne NMS, default settings enable you to monitor the many technologies on the devices you add to SevOne NMS. SNMP and VMware require you to enter some information about your network and the Technologies wizard page enables you to get started.
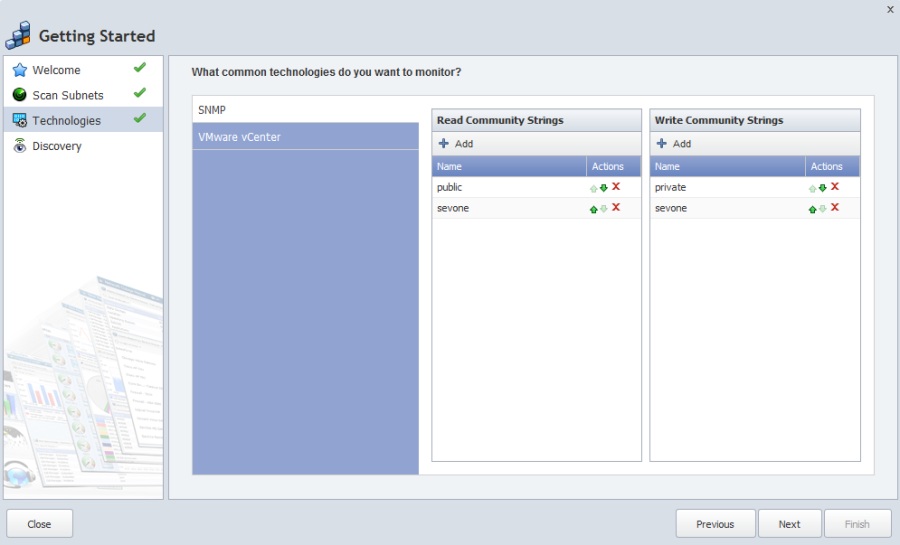
SNMP
The SNMP subtab enables you to enter the community strings SevOne NMS needs to monitor SNMP data. You can update these settings on the Cluster Manager Cluster Settings tab.
-
In either the Read Community Strings column or the Write Community Strings column click Add to add a new line to the list.
-
In the text field, enter the string and click Update to add the string.
-
Click
 or
or  to move the string up or down through the list.
VMware
The VMware vCenter subtab enables you to enter the VMware vCenter login credentials. The VMware Browser enables you to add additional vCenters and to manage the devices from which to poll VMware data.
-
In the VMware vCenter IP Address field, enter the IP address of the VMware vCenter.
-
In the Device Name field, enter the name of the VMware vCenter.
-
In the Username field, enter the user name SevOne NMS needs to authenticate onto the vCenter.
-
In the Password field, enter the password SevOne NMS needs to authenticate onto the vCenter.
-
Select the Automatically Discover Devices check box to poll the vCenter's hosts and virtual machines on a daily basis.
Click Next.
Discovery
The Discovery wizard page enables you to set the time for SevOne NMS to perform the daily Automatic Discovery process, to define the email server that SevOne NMS uses to email reports and alerts, and to create the user accounts for the users who are members of the Administrators user role.
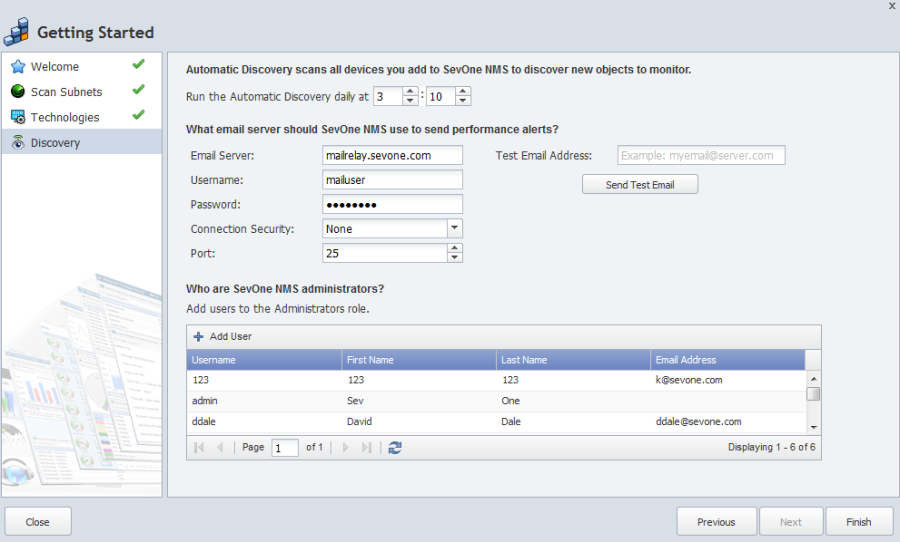
Discovery is the process to query and update information about the devices that are in SevOne NMS. Device discovery creates new objects in SevOne NMS, updates existing objects, and ultimately deactivates and deletes unused objects.
-
Manual Discovery - The Manual Device discovery process runs every two minutes to scan the devices in SevOne NMS that you mark for discovery
-
Automatic Discovery - The Automatic Discovery process tests the various plugins/technologies you configure for each device and updates the device's current state.
Click the Run the Automatic Discovery daily at drop-downs and select the time to run the Automatic Discovery process. This setting affects only this peer. You define the Automatic Discovery time for each peer in the cluster on the Cluster Manager - Peer Settings tab.
Email Server
The middle section enables you to enter the email server information for SevOne NMS to use to notify users of alerts and to send reports to users. You can update these settings on the Cluster Manager – Cluster Settings tab.
Note: The email server must be able to accept large attachments because a .pdf report can be over 20MB.
-
In the Email Server field, enter the hostname or IP address of the SMTP email server for SevOne NMS to use to send emails.
-
In the Username field, enter the user name SevOne NMS needs to authenticate onto the email server.
-
In the Password field, enter the password SevOne NMS needs to authenticate onto the email server.
-
Click the Connection Security drop-down and select a connection security protocol.
-
In the Port field, enter the port on the email server for SevOne NMS to use.
-
In the Test Email Address field, enter the email address to which you want to send a test email.
-
Click Send Test Email to send a test email to the address you enter in the previous step.
Administration Users
The lower section enables you to add users who are to be members of the Administrators user role. You must define the email server before you can add Administrator role users and you add all other users with any other user roles on the User Role Manager. Each user can update their user settings, except username, on the Preferences page.
-
Click Add User to add a line to the list.
-
In the Username field, enter the name for the user to enter into the Username field on the Login page. After you save the user information, you cannot edit the Username.
-
In the First Name field, enter the first name to appear wherever a user name appears.
-
In the Last Name field, enter the last name to appear wherever a user name appears.
-
In the Email Address field, enter the email address where you want SevOne NMS to send emails to the user.
-
Click Update to save the user credentials. SevOne NMS sends an email to the user with the user's log on credentials.
Click Finish to start the scan of any subnets you define on the Scan Subnets wizard page.
Setup is Complete
The Setup is Complete wizard page provides links to additional help topics that describe how to create Device Groups, how to Manage Users, and how to Manage Reports.
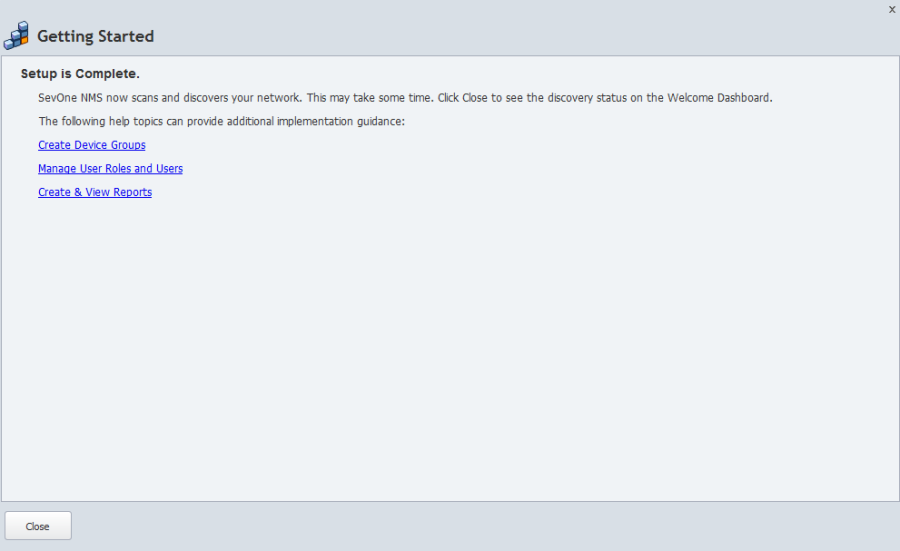
Click Close to navigate to the Welcome Dashboard.
Change SevOne NMS Admin Password
You should change the admin user password to protect access to the SevOne NMS application.

-
Click the Manage Users link to display the User Manager (or Administration > Access Configuration > User Manager).
-
Click
 next to the admin user to display a pop-up.
 -
In the Password field, enter a new password for the admin user.
-
In the Confirm field, re-enter the password.
-
Click Save.
SevOne PLA Login
The SevOne PLA software application is fully loaded on the appliance.

-
Enter the URL or IP address for the SevOne PLA appliance into your web browser to display the Login page.
-
For a new installation, the default administrator user Username is admin.
-
In the Password field, enter SevOne (case sensitive).
-
Press Enter.
Change SevOne PLA Admin Password
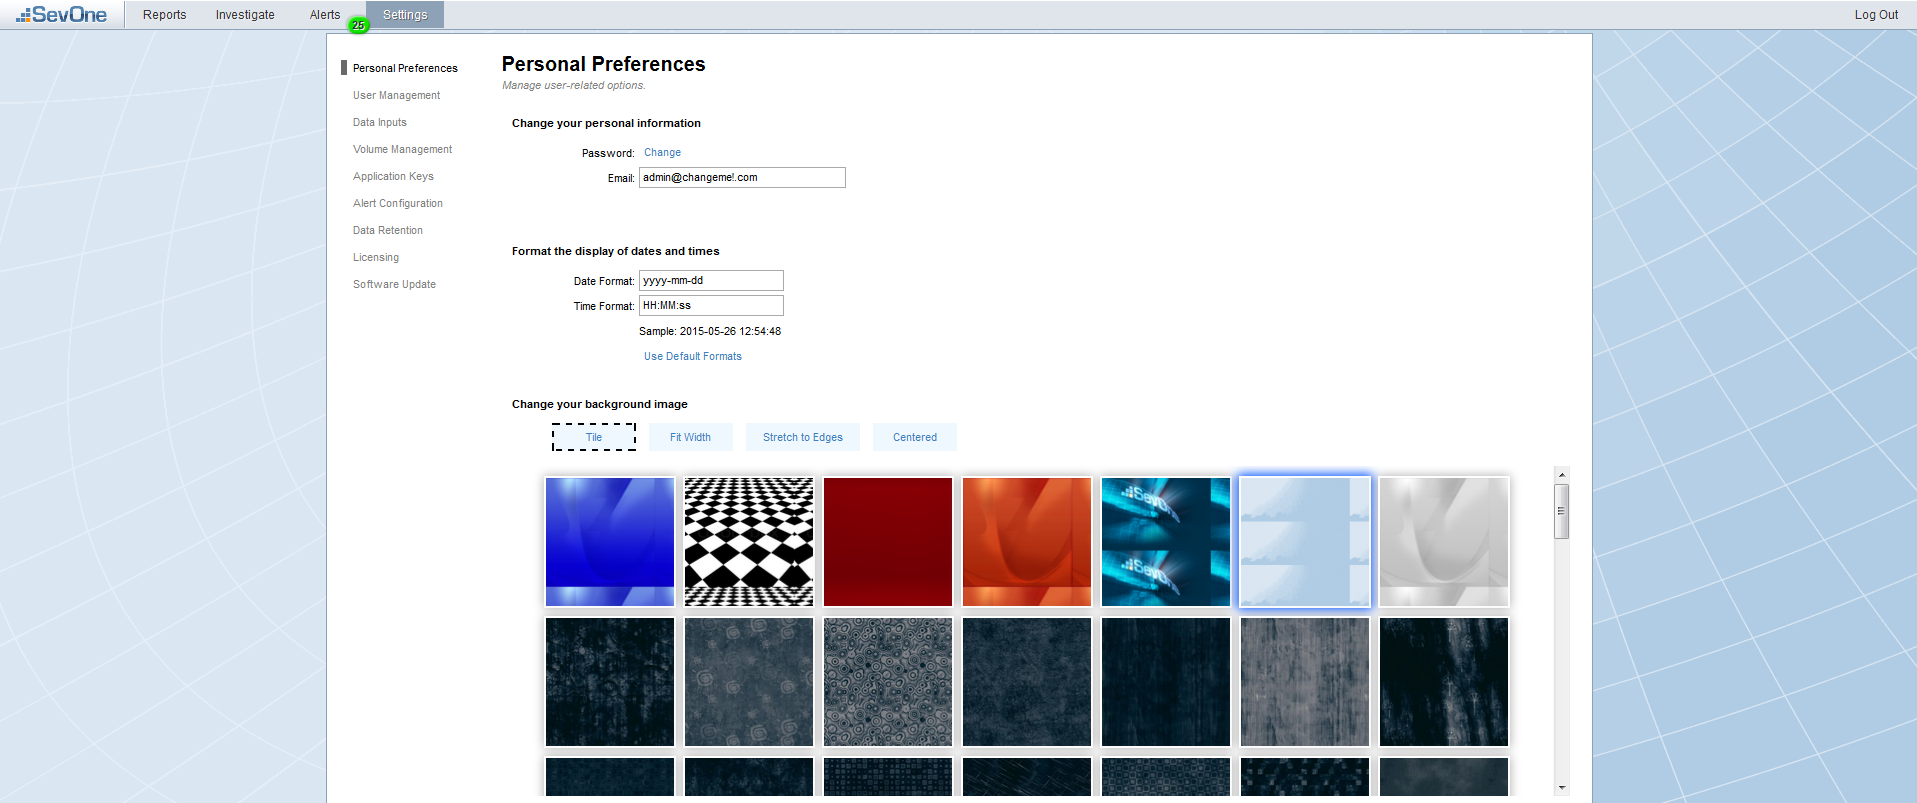
You should change the admin user password to protect access to the SevOne PLA application.
-
From the navigation bar, click Settings to display the Settings page.
-
On the left, click Personal Preferences.
-
Click the Change link next to the Password caption to display the Change Password pop-up.
-
In the New Password field, enter a new password for the admin user.
-
In the Confirm field, re-enter the password.
-
Click Save.
-
Make any other applicable preference changes.
Build Your SevOne NMS Cluster
When you receive several new appliances/vPASs and/or your implementation includes a Hot Standby Appliance, perform the steps needed to get the new appliance/vPAS into your network before you add anything to the appliance.
Hot Standby Appliance
When you add the vPAS as a Hot Standby Appliance you must call SevOne Support to ensure that the Hot Standby Appliance is appropriately implemented.(Email: support@sevone.com - Phone: +1 302-319-5400)
New Appliance/vPAS to Add a Peer to an Existing Cluster
When you receive a new appliance/vPAS that you want to add to an existing cluster, perform the following steps. The SevOne NMS Cluster Manager provides and Integration tab to enable you to add this PAS appliance as a new peer to your SevOne cluster.
-
All data on this peer/appliance will be deleted.
-
You need to know the name of this peer (appears in the cluster hierarchy on the left side of the Cluster Manager). You define the peer name when you perform the steps in the Network Configuration chapter and you can change the peer name from the peer level on the Cluster Manager.
-
You need to know the IP address of this appliance (appears in the cluster hierarchy on the left side of the Cluster Manager). You define the IP address when you perform the steps in the Network Configuration chapter.
-
You need to be able to access the Cluster Manager on a SevOne NMS peer that is already in the cluster to which you intend to add this appliance.
-
If you do not complete the steps within ten minutes, you must start again at step 2. Click Allow Peering … to queue this peer/appliance for peering within the following ten minutes.
Perform the following steps to add this PAS appliance to an existing SevOne cluster.
-
From the Startup Wizard on the new appliance, select the Add this appliance to an existing SevOne NMS Cluster option and click Next to access the Cluster Manager Integration tab.
-
Click Allow Peering here on the Integration tab on the new appliance.
-
Log on to a SevOne NMS peer that already exists in the destination cluster.
-
Go to the Cluster Manager (Administration > Cluster Manager).
-
At the Cluster level select the Peers tab.
-
Click Add Peer to display a pop-up.
-
Enter the Peer Name and the IP Address of the new peer/appliance.
-
On the pop-up, click Add Peer.
-
All data on the peer/appliance you are adding is deleted.
-
Do not do anything on the peer you are adding until a Success message appears on the peer on which you click Add Peer.
-
You can continue working and performing business as usual on all peers that are already in the cluster.
-
The new peer appears on the Peers tab in the destination cluster with a status message. Click Refresh to update the status.
-
The new peer appears in the cluster hierarchy on the left.
-
-
After the Success message appears on the peer in the destination cluster, you can go to the peer you just added and the entire cluster hierarchy to which you added the peer should appear on the left.
-
You can use the Device Mover to move devices to the new peer.
If the integration fails, Click View Failed Logs on the Peers tab on the peer that is in the destination cluster to display a log of the integration messages.
Click Clear Failed to remove failed attempts from the list. Failed attempts are not automatically removed from the list which enables you to navigate away from the Peers tab during the integration.
New Appliances in a New Multi Peer Implementation
When you receive multiple PAS appliances/vPASs and you plan to create a brand new SevOne NMS cluster, there are two approaches.
Approach 1
-
Use the Cluster Manager to add all of your new appliances as peers to the cluster.
-
Add devices.
Approach 2
-
Add all devices to one peer.
-
Use the Cluster Manager to add all other appliances you want in the cluster as peers with this appliance.
-
Use the Device Mover to move devices to other peers.
Add a SevOne PLA to a SevOne NMS Cluster
Perform the following steps to include the SevOne PLA in a SevOne NMS cluster.
Generate Token
You can enter the following command on the SevOne PAS appliance to generate a token for the PLA appliance.
wget http://<PLA Appliance IP Address>/rapid/req.php --post-data-data='{"action": "request-superadmin-action-tokens", "user":"admin", "pass":"test" }' -qO-
To avoid sending credentials over the wire, you can enter the following command on the PLA appliance. Substitute localhost for the IP address.
wget http://localhost/rapid/req.php --post-data='{"action": "request-superadmin-action-tokens", "user":"admin", "pass":"test" }' -qO-
Sample Return:
{"tokens":{"function":"get-mass-volume-info","token":"kNHtKMSisibA0tvpBXVt"}}
Store Authentication Token and PLA IP Address in the SevOne-act
Enter the following command on the SevOne PLA appliance.
SevOne-act pla init-set-pla --ip <PLA Appliance IP Address> --token <Token>
Map Log Data
To map the log data that SevOne PLA collects for volumes to the device groups/device types in SevOne NMS, perform the following steps on the Cluster Manager from a SevOne NMS appliance. This integration is available in SevOne NMS version 5.4.0 and higher.
-
From the SevOne NMS navigation bar, click the Administration menu and select Cluster Manager.
-
If needed, click
 Cluster in the cluster hierarchy on the left to display the cluster level configuration tabs.
 -
Select the Log Data Mapping tab.
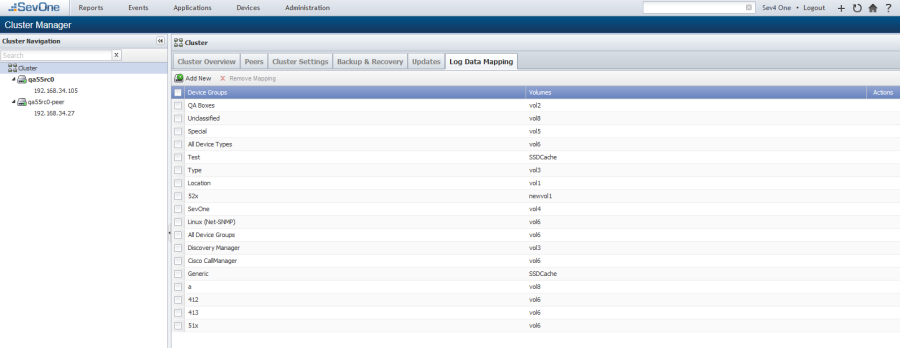
-
Click Add Mapping or click
 to display the Add/Edit Mapping pop-up.
 -
Click the Device Group drop-down and select the SevOne NMS device group/device type to which to map log data.
-
Click the Volume drop-down and select the SevOne PLA volume from which to map log data.
-
Click Save.