
Table of Contents (Start)
SevOne NMS 5.4 Quick Start Guide - Metadata
About Metadata
Simply put, metadata is information that tells us about other information. Metadata is all over the place. With Microsoft Word, metadata makes it easy for us to find out things like the author's user name, when a file was created and last modified, the file size, the total editing time, etc. Metadata for MP3 files allows us to view and edit information about tracks, such as the song title, artist's name, album title, release year, and track number, for example. Social media also uses metadata. In fact, a single Twitter Tweet, limited to 140 characters, has 150 pieces of metadata!
SevOne NMS uses metadata for a lot of things–such as device names, names of peers polling devices, number of objects, and object names, to name just a few examples. As of SevOne NMS 5.4, SevOne has introduced new Metadata features that allow you to create custom metadata attributes for your devices, objects, device groups, device types, and object groups.
In this document, we'll take a look at the following topics:
-
Creating namespaces and metadata attributes
-
Populating metadata attributes
-
Creating a report on metadata attributes
SevOne Metadata
SevOne's Metadata features give you flexibility to specify exactly what information you would like to include. You can say just about anything you want about a given device, object, device group, device type, or object group. You can use metadata attributes to provide site locations, software version information, IP addresses, MAC addresses, local contact information, and serial numbers, along with tons of other information. You can even create a metadata attribute to describe the color of your devices!
The following are just a few examples of information you can include for all your company's routers, switches, servers, etc., using metadata:
-
Location
-
Contact person
-
Contact phone
-
Clickable link to service records
-
IP address
-
MAC address
-
Serial number
-
Installation date
-
Software version
Another great benefit of SevOne Metadata is instant access to important information. If you notice a problem with a router, you can instantly view all the essential information for it. If it's at a remote location, and you need a reset, you immediately know where it's located. You also know who to call and how to reach them–no need to open a separate application or dig around for a sticky note!
Prerequisites
To use SevOne's Metadata features, you'll need SevOne NMS version 5.4 or higher.
Configuration Steps
The steps below will walk you through creating and populating metadata attributes. After that, you'll create a report based on those metadata attributes. We'll be working with a couple examples. Feel free to follow the examples or use other specifications.
About Namespaces and Metadata Attributes
SevOne NMS uses namespaces to group metadata attributes. You can create multiple namespaces, and within each namespace you can create multiple attributes. Each attribute includes the following three features:
-
Attribute Name
-
Attribute Type
-
Target
The Attribute Name is the name you give to a specific attribute. For example, if you have an attribute for providing the serial number of a device, you might name it Serial Number or SN.
The Attribute Type is used to validate entry inputs. It specifies the format of the data that users will provide for a specific attribute. If you would like to include the installation date for a device, for example, you might create a metadata attribute and call it Installation Date. Because you want it to be in date format, you would select the attribute type Date/Time. This means that data provided for the Installation Date attribute must conform to the Date/Time format. Additional attribute types include IP Address, MAC Address, Integer, Latitude and Longitude, Regular Expression, and URL. There's also an attribute type called Text, which you can use for any number of things, such as phone numbers, names of people, serial numbers, notes, etc.
Target refers to the areas in SevOne NMS that you can apply a specific metadata attribute to. For example, let's say your company has several offices throughout the US. One of your offices is in San Diego, and you'd like to provide a site contact phone number for all of the devices at the San Diego location. In this case, you'll want to select Device as a target. This gives you the ability to use your site contact phone number attribute for individual devices. You can also select Device Group, Object, and Object Group as targets, allowing you flexibility to use an attribute for device groups, device types, objects, and object groups.
Create Metadata Attributes
Create a namespace and add an attribute.
Before you start creating attributes, you need a place to put them. In the first few steps, you'll create a namespace. Once you've done that, you can add your first attribute to it. We'll be working through the steps using an example. Feel free to follow along with the example or make different selections.
-
From the navigation bar, click Administration and select Metadata Schema.

-
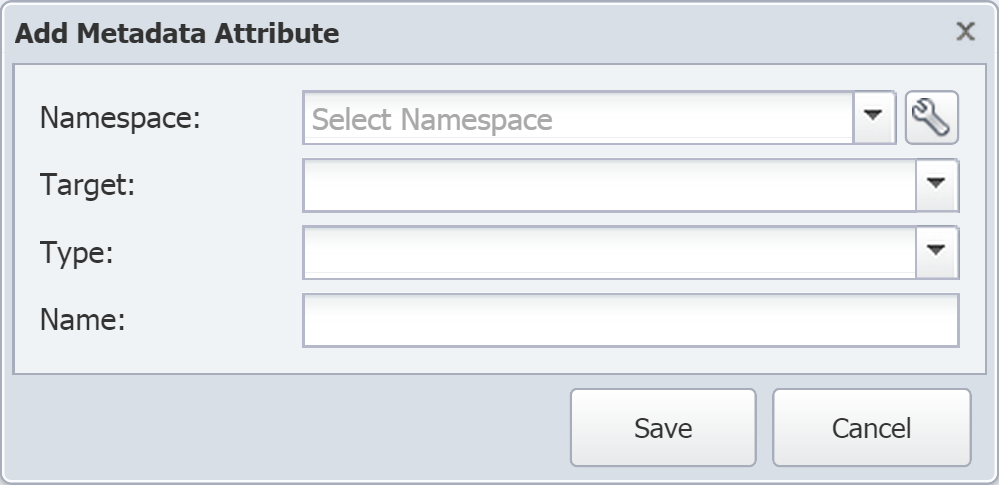
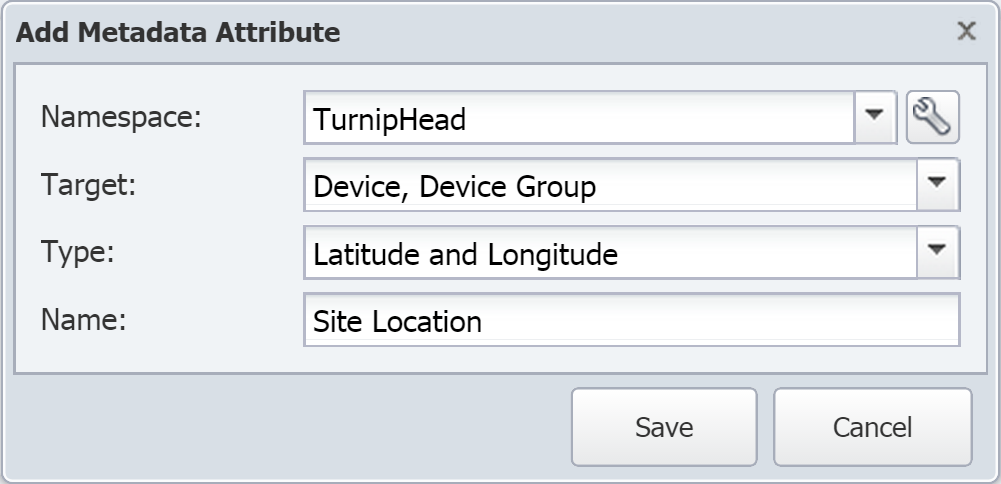
At the top of the page, click Add Attribute to display the Add Metadata Attribute pop-up.
-
Perform the following actions to add a namespace.
-
Click
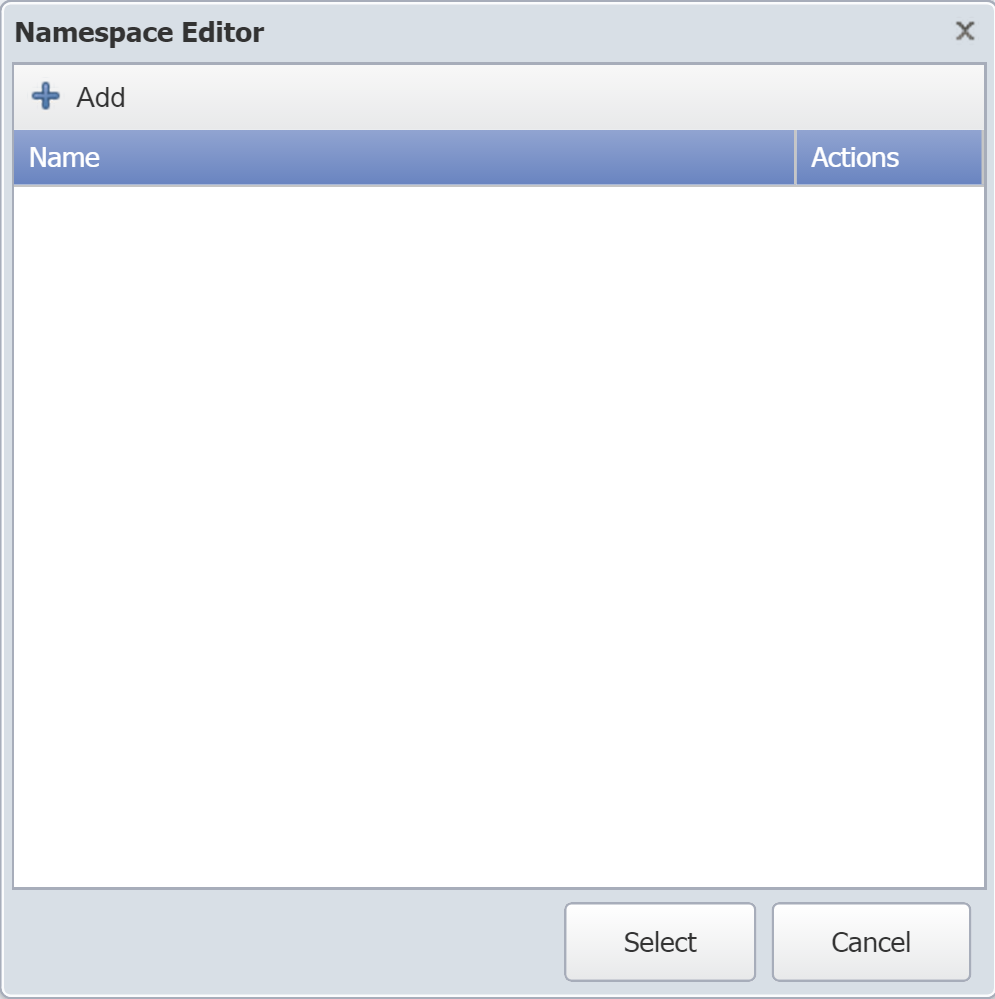
 to display the Namespace Editor pop-up.
-
Click Add.
-
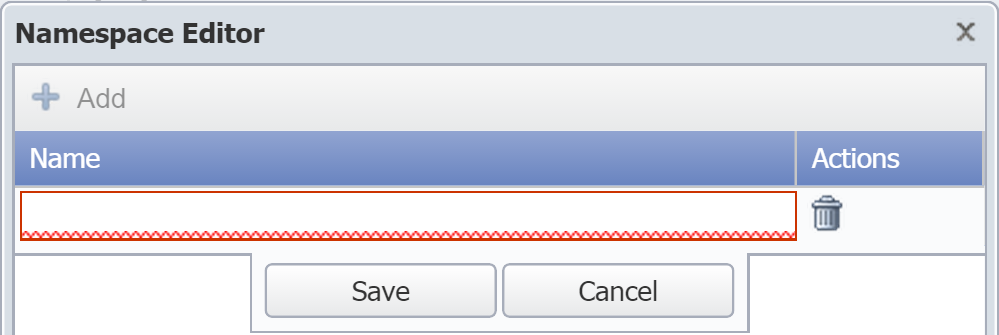
In the text field that appears, enter a name for the namespace. This can be anything you want.
-
Click Save to save the namespace.
-
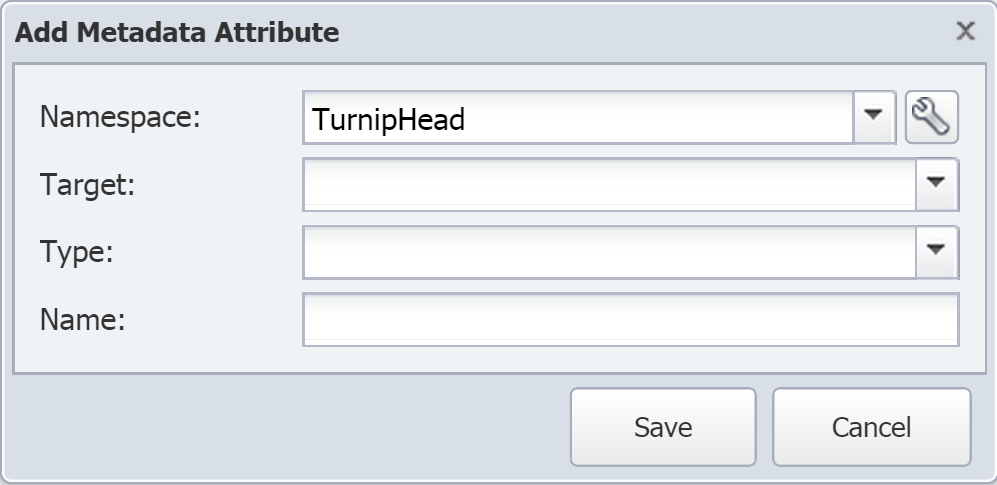
Your new namespace will appear in the list. Click it and then click Select to return to the Add Metadata Attribute pop-up.
-
-
The Target drop-down lets you specify one or more of the following attribute targets. For our example, select Device and Device Group.
-
Device - lets you apply/edit the attribute's values for specific devices, using the Device Manager.
-
Object - lets you apply/edit the attribute's values for specific objects, using the Object Manager.
-
Device Group - lets you apply/edit the attribute's values for specific device groups and device types, using the Device Groups page and the Device Types page.
-
Object Group - lets you apply/edit the attribute's values for specific object groups, using the Object Groups page.
-
-
The Type drop-down lets you specify one of the following attribute types. For now, select Latitude and Longitude.
-
Date/Time - enables the value to be in a date/time format.
-
Integer - enables the value to be numeric.
-
IP Address - enables the value to be an IP address.
-
Latitude and Longitude - enables the value to be a latitude and longitude.
-
MAC Address - enables the value to be a MAC address.
-
Regular Expression - enables the value to be a regular expression.
-
Text - enables the value to be text.
-
URL - presents the value as a clickable link to a valid URL.
-
-
In the Name field, enter a name for the metadata attribute. For this one, let's say Site Location.
-
Click Save. Your new namespace should now appear with your new attribute, Site Location, listed below it.

Add a couple more attributes.
Now that you've got a namespace set up, you can add additional attributes pretty quickly.
-
Click Add Attribute to display the Add Metadata Attribute pop-up.
-
Click the Namespace drop-down and select the namespace that you created earlier.
-
Click the Target drop-down and select Device and Device Group.
-
Click the Type drop-down and select Text.
-
In the Name field, enter Site Contact Phone.
-
Click Save.
-
Repeat the steps above. For step 4, select URL. For step 5, enter Service Record.
-
Your new attributes should appear below your namespace. To edit the settings for any of the attributes, select the attribute and click
 .
.

Additional information: Making changes to a namespace
Perform the following steps to make changes to a namespace.
-
Select an attribute that belongs to the namespace that you would like to edit.
-
Click
 to display the Edit Metadata Attribute pop-up.
 -
To the right of the Namespace drop-down, click
 to display the Namespace Editor.
 -
You can make the following changes to the namespace.
-
Edit the namespace: Under Name, double-click the namespace to make changes to the name. Once you're done, click Save.
-
Delete the namespace: Select the namespace. Under Actions, click
 . Then click Yes to confirm that you want to remove the namespace.
-
Populate Metadata Attributes
In this section, you're going to populate the attributes that you just created with meaningful data.
-
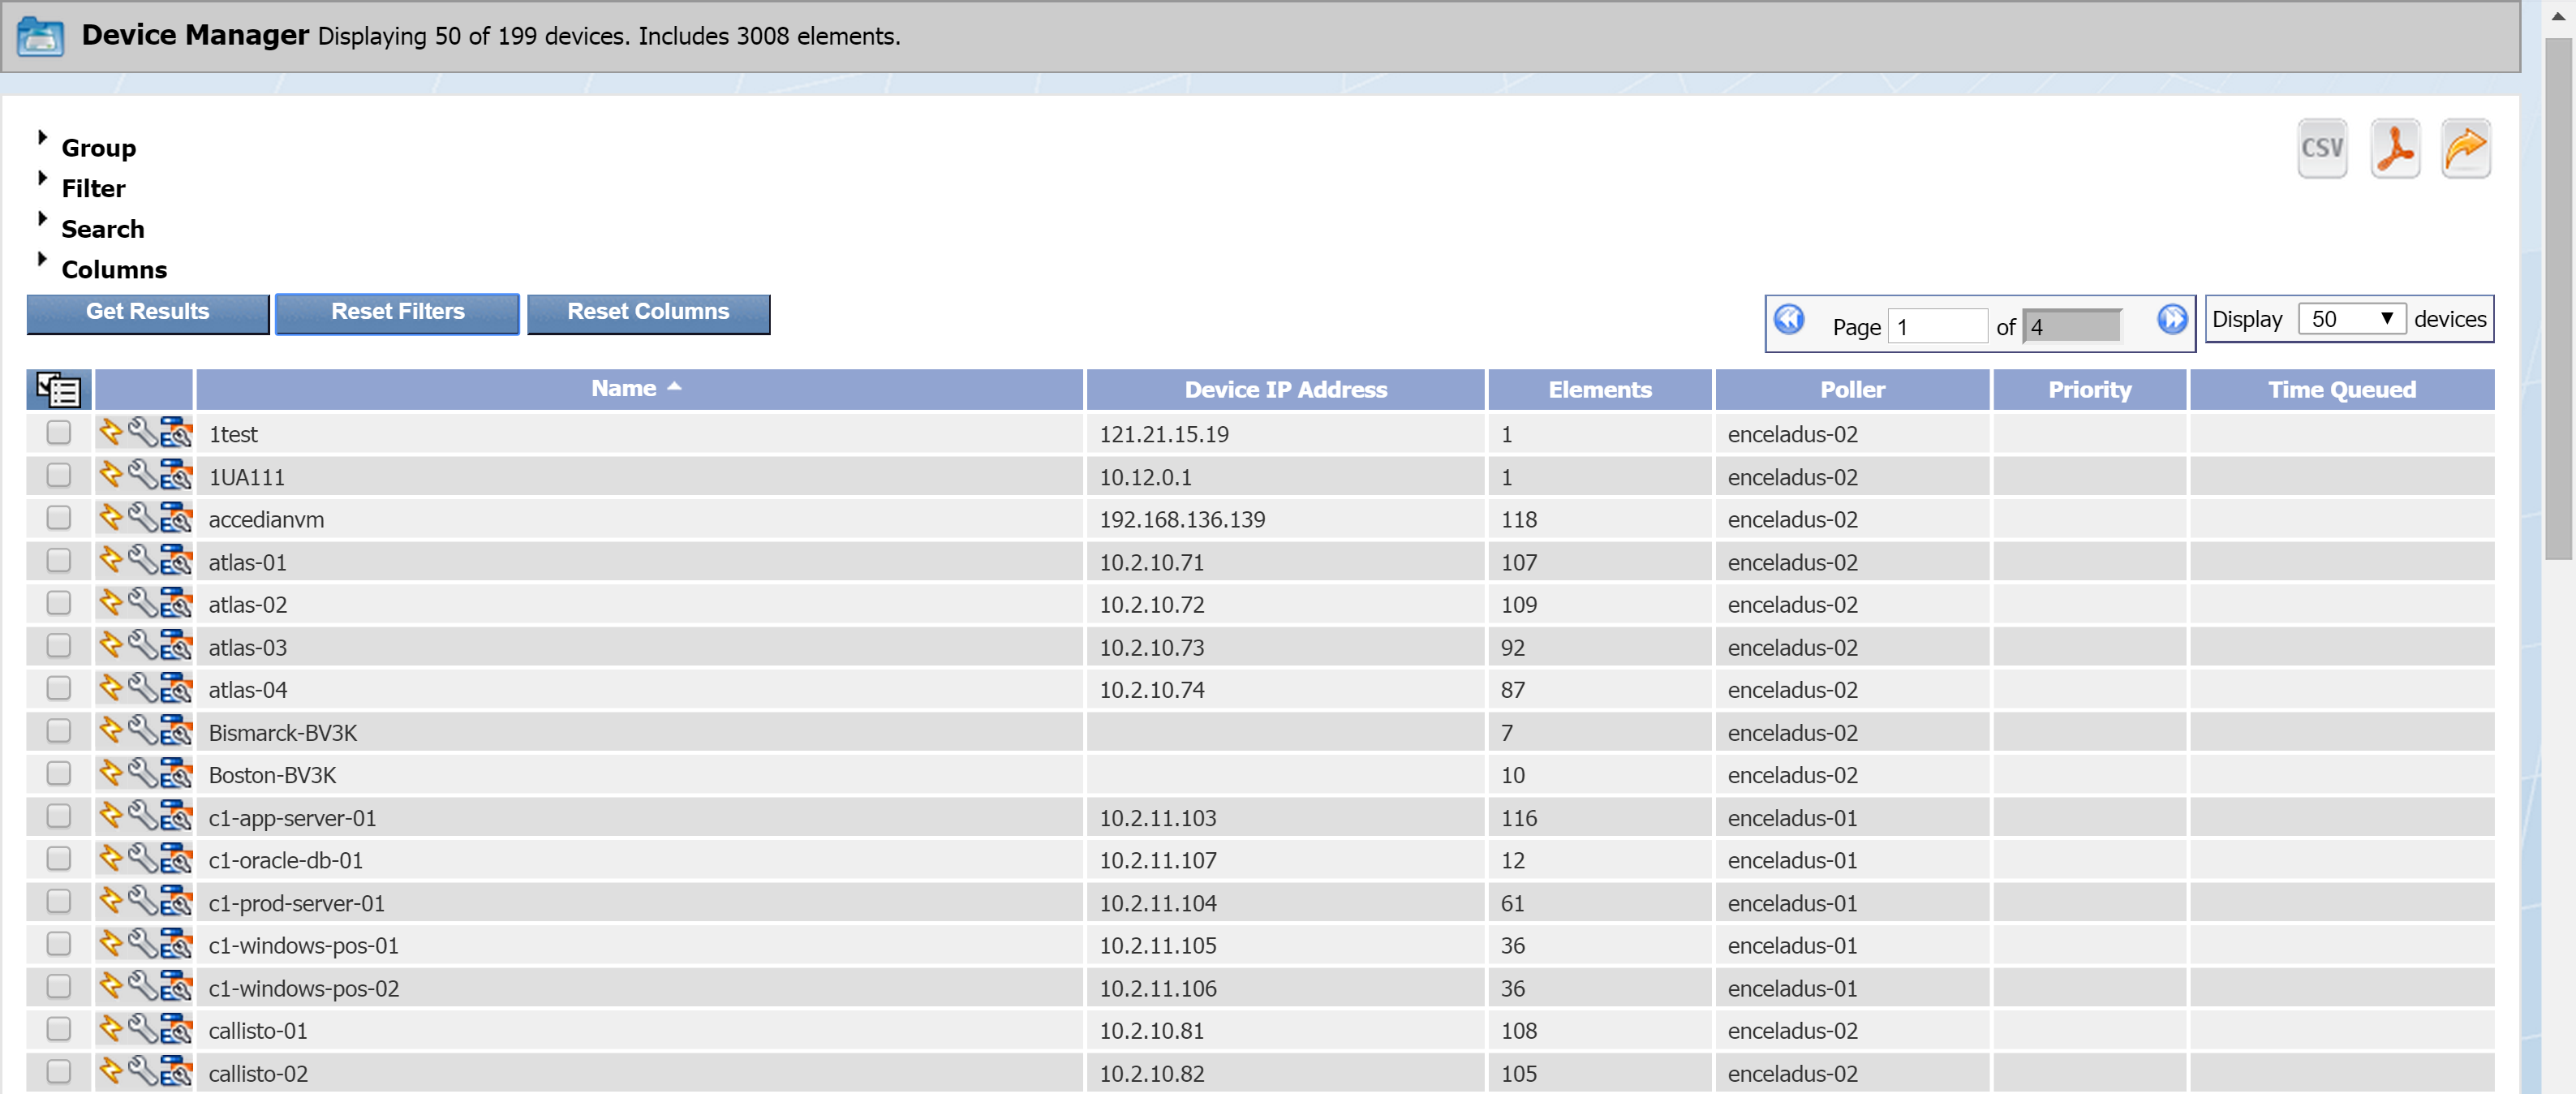
From the navigation bar, click Devices and select Device Manager.
-
Select a device and click
 to display the Edit Metadata pop-up for it.
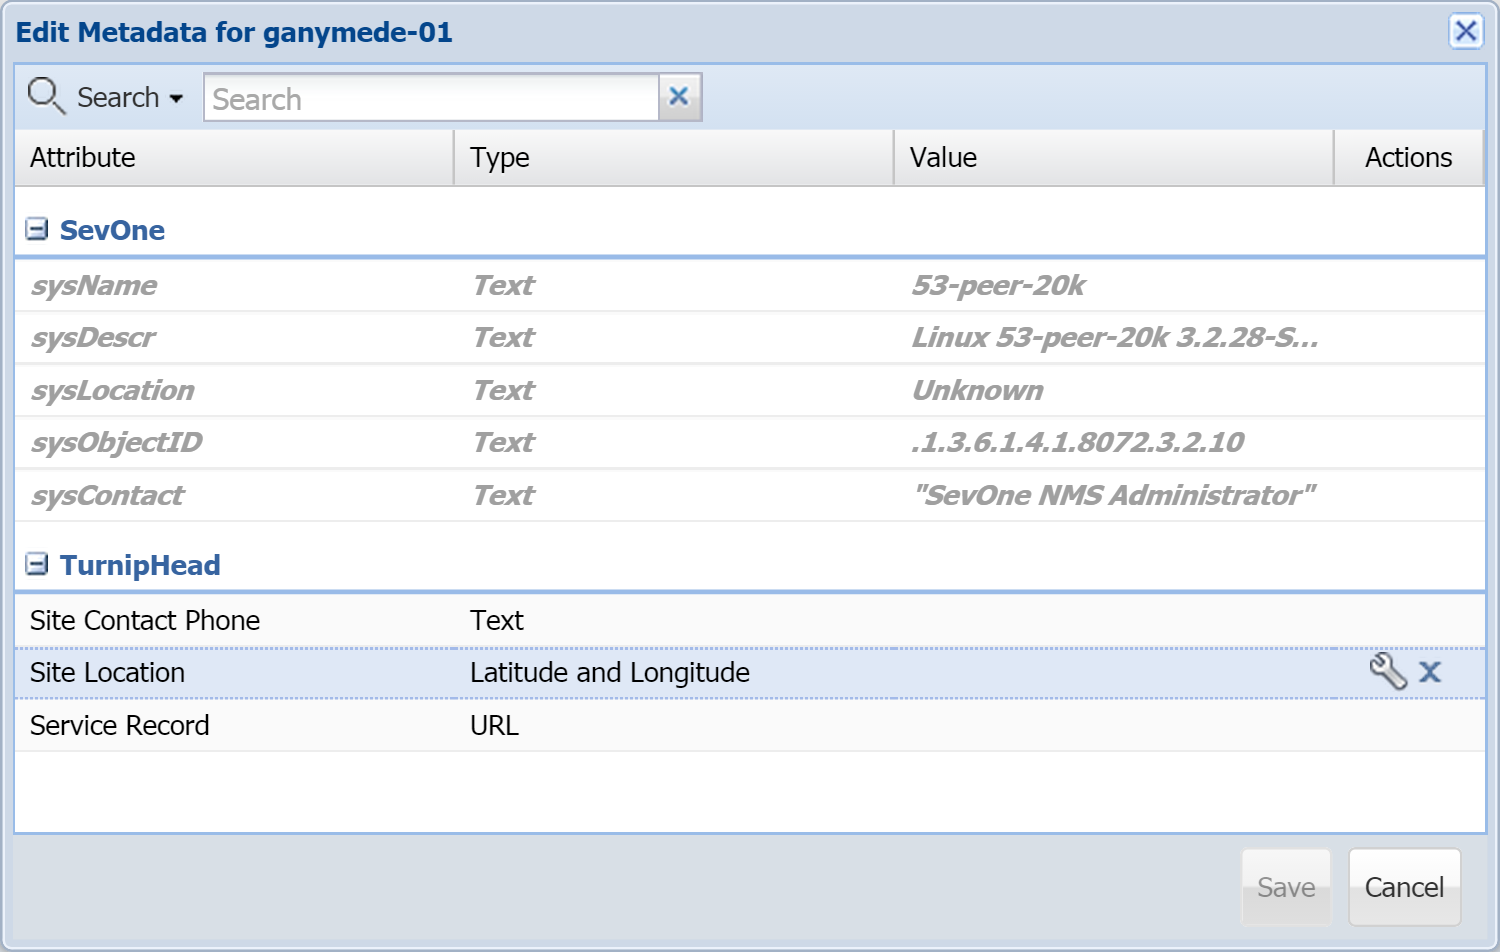
You can edit metadata values for multiple devices at the same time. First, select the devices. In the upper left corner of the table, click
 and select Tools. Then select Edit Metadata to display a pop-up where you can edit the metadata values for all of the selected devices.
 -
Under the namespace that you created earlier, locate and select the Site Location attribute.
-
Click
 to edit the values for Site Location.
-
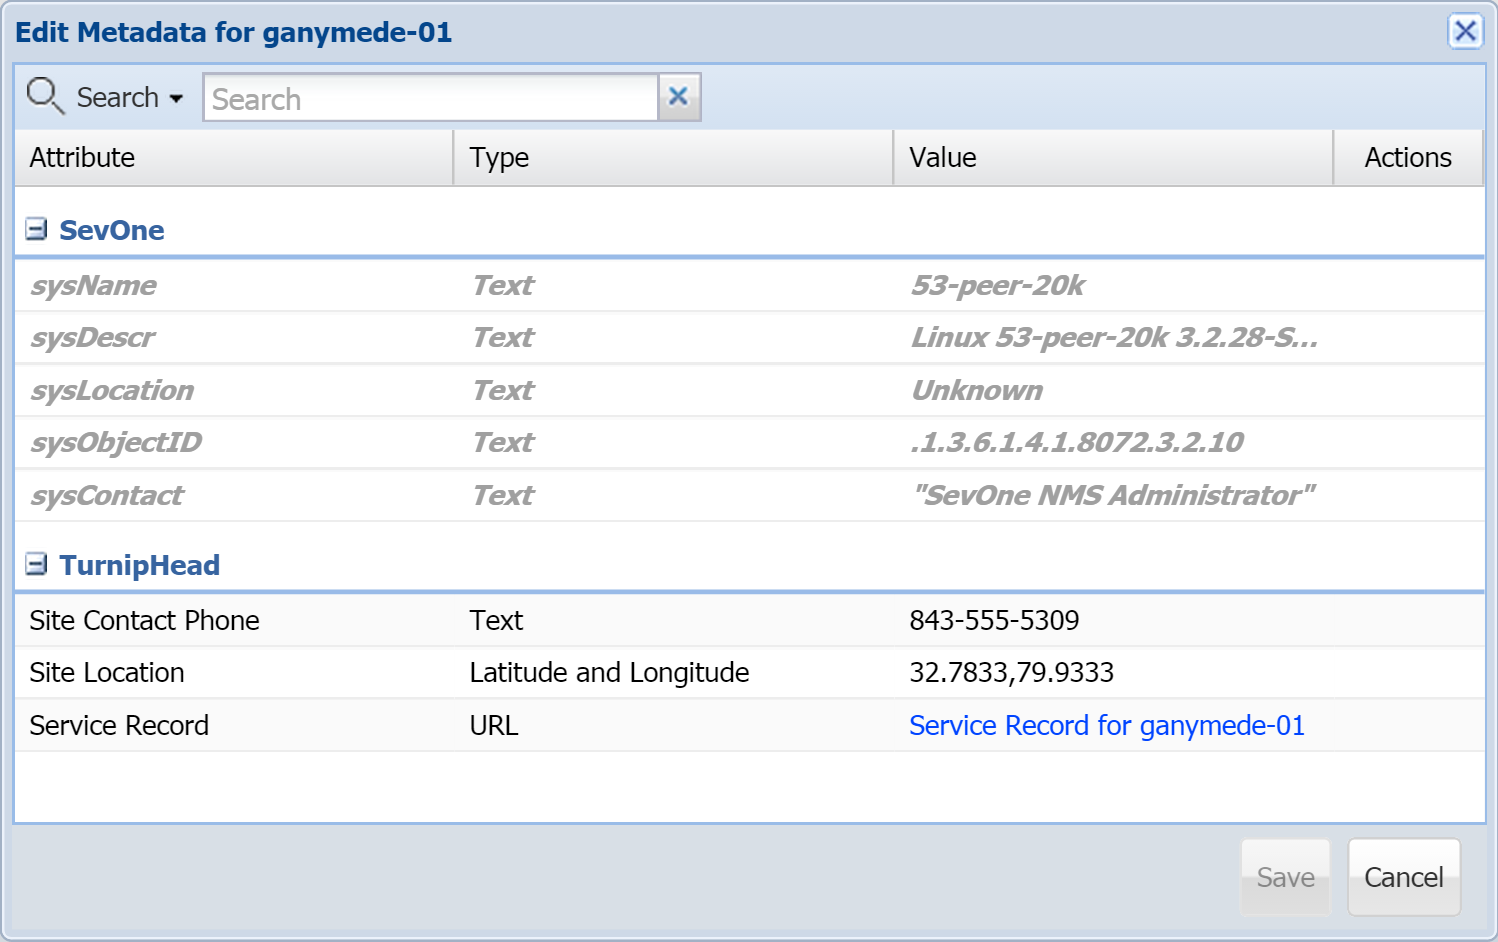
In the Latitude field, you'll need a decimal value between -90.00 and 90.00. For our example, let's enter 32.7833 .
-
In the Longitude field, you'll need a decimal value between -180.00 and 180.00. Enter 79.9333 .
-
Click Update to apply the changes.
-
Locate the Site Contact Phone attribute and click
 to edit the value for it. Enter 843-555-5309 for our example.
-
Click Update.
-
Locate the Service Record attribute and click
 to edit the values for it.
-
In the Link display text field, enter a name for the link. For this example, we might say Service Record for ganymede-01 .
-
In the URL field, enter a URL for the link. You can enter any working URL for the example.
-
Click Update.
-
Before continuing, click the link Service Record for ganymede-01 to confirm that the URL is correct.
-
Click Save.
Create a Report on Metadata Attributes
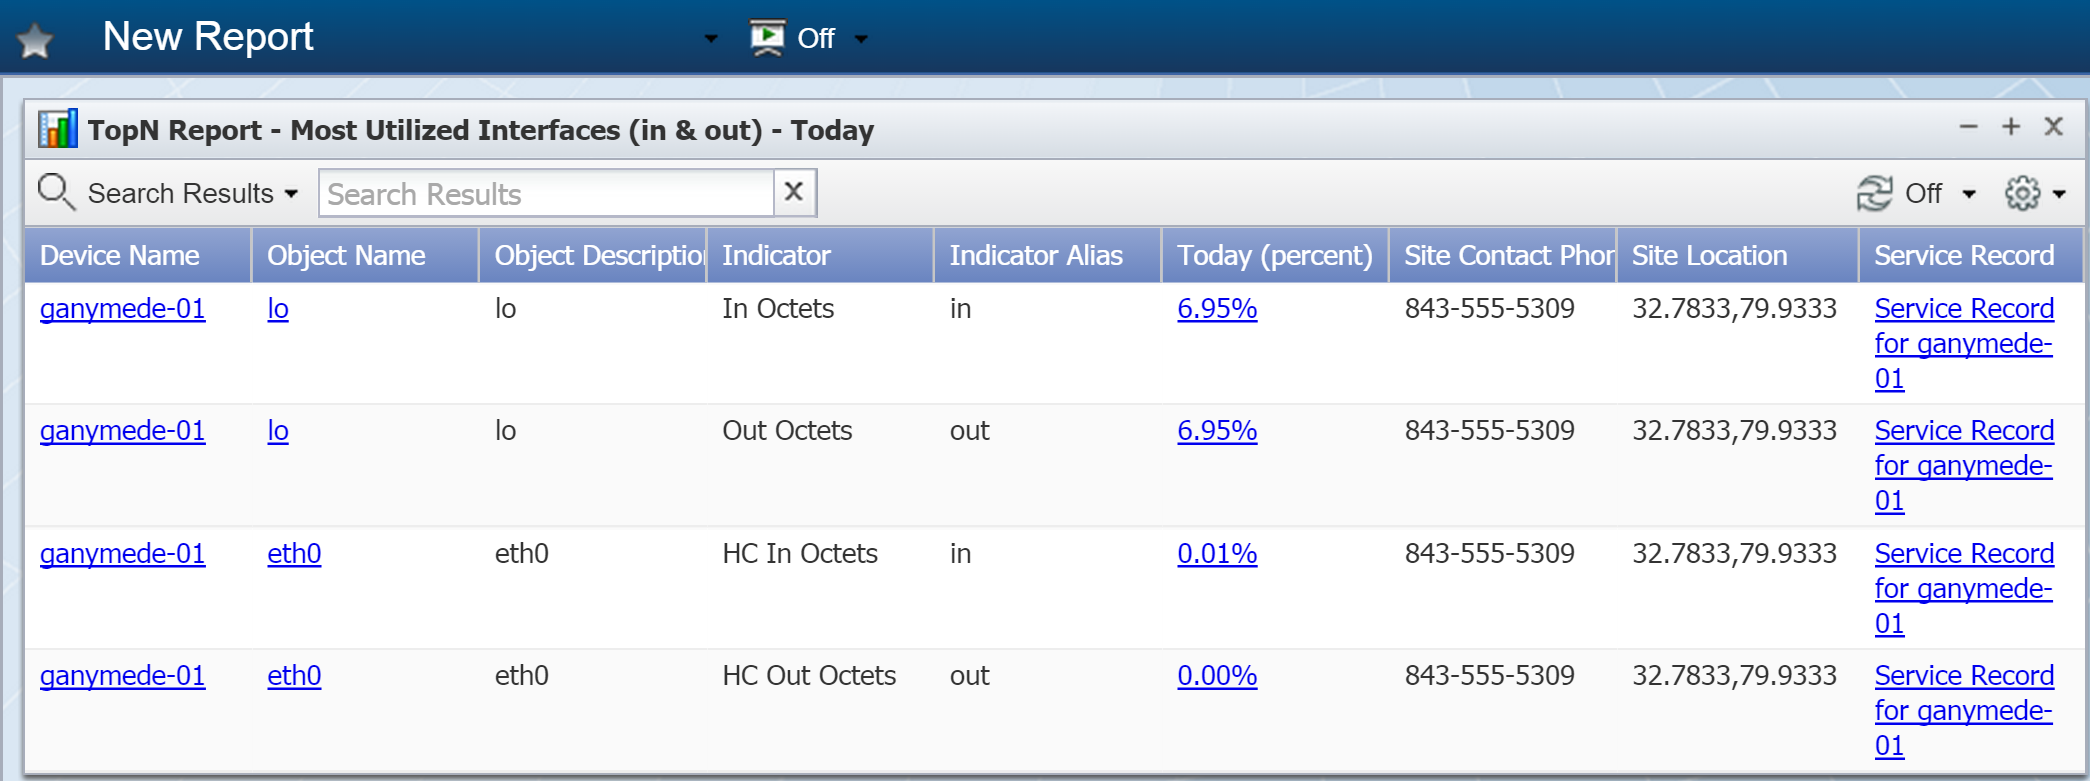
Now we're going to create a TopN report for the device that we looked at in the last section. Our report results will show us the most utilized interfaces along with metadata information for the device.
-
From the navigation bar, click Report and select Create Report.
-
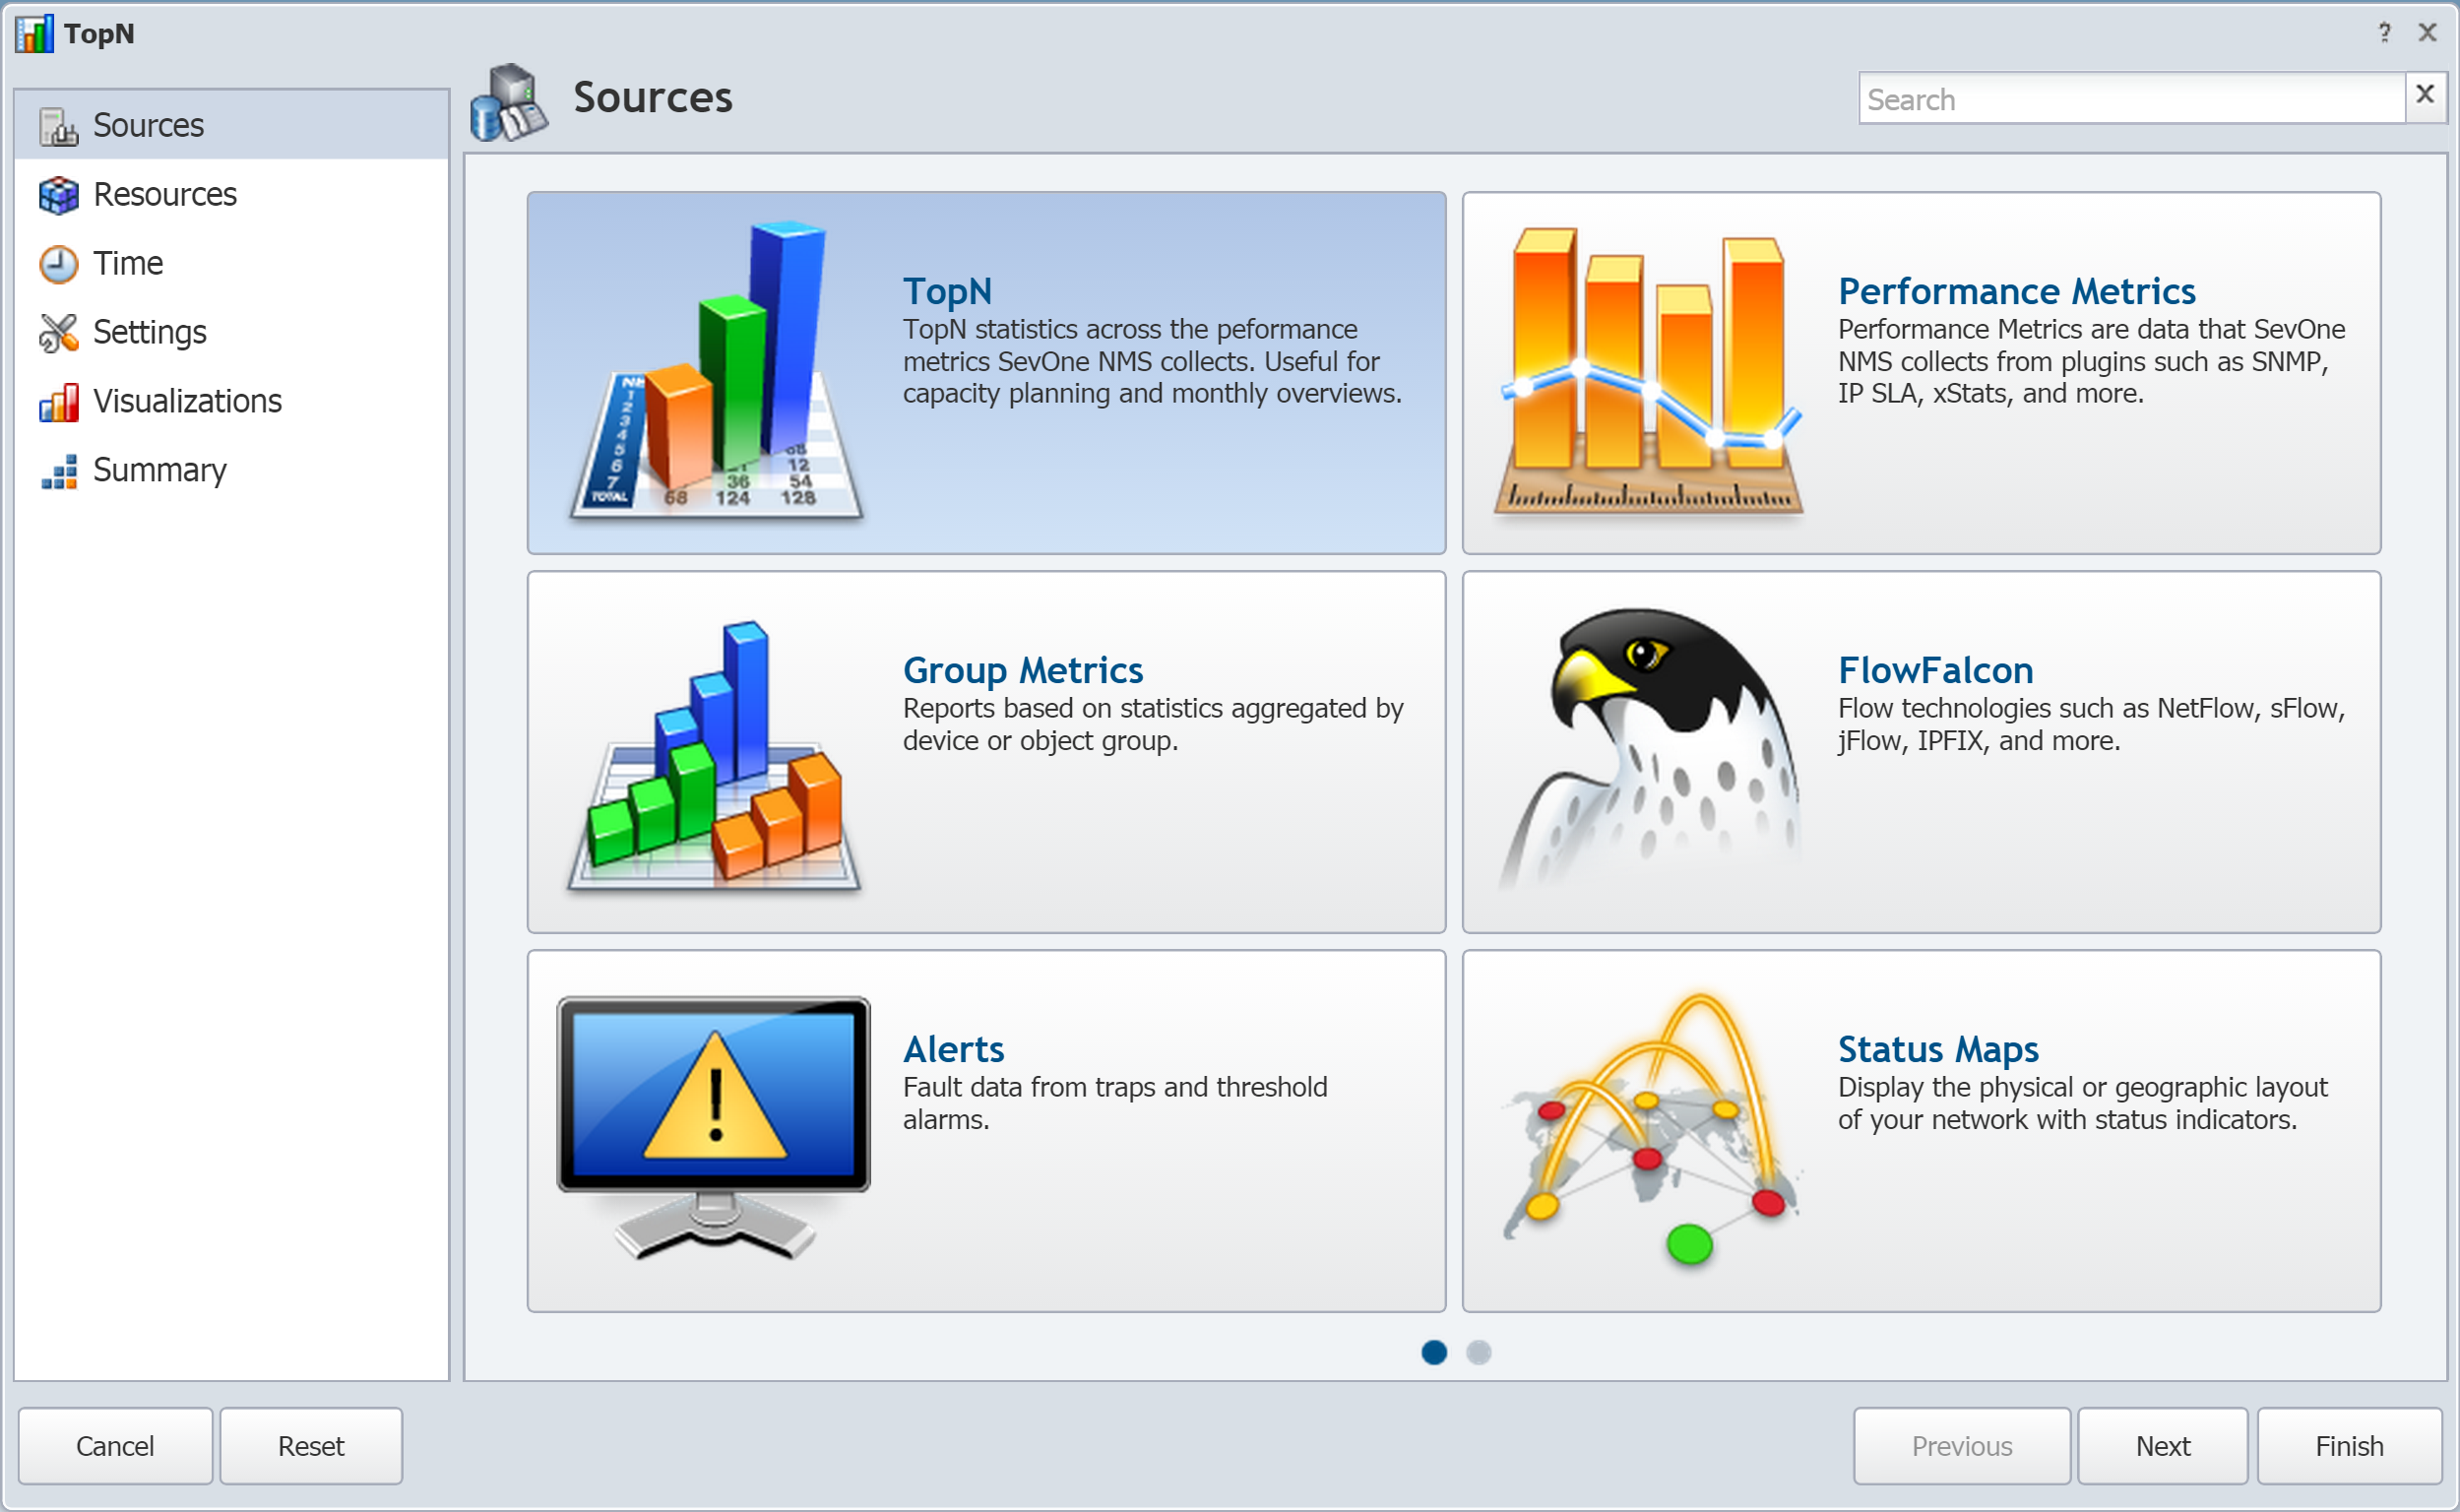
The Sources page is set to TopN by default. That's what we want. Click Next.
-
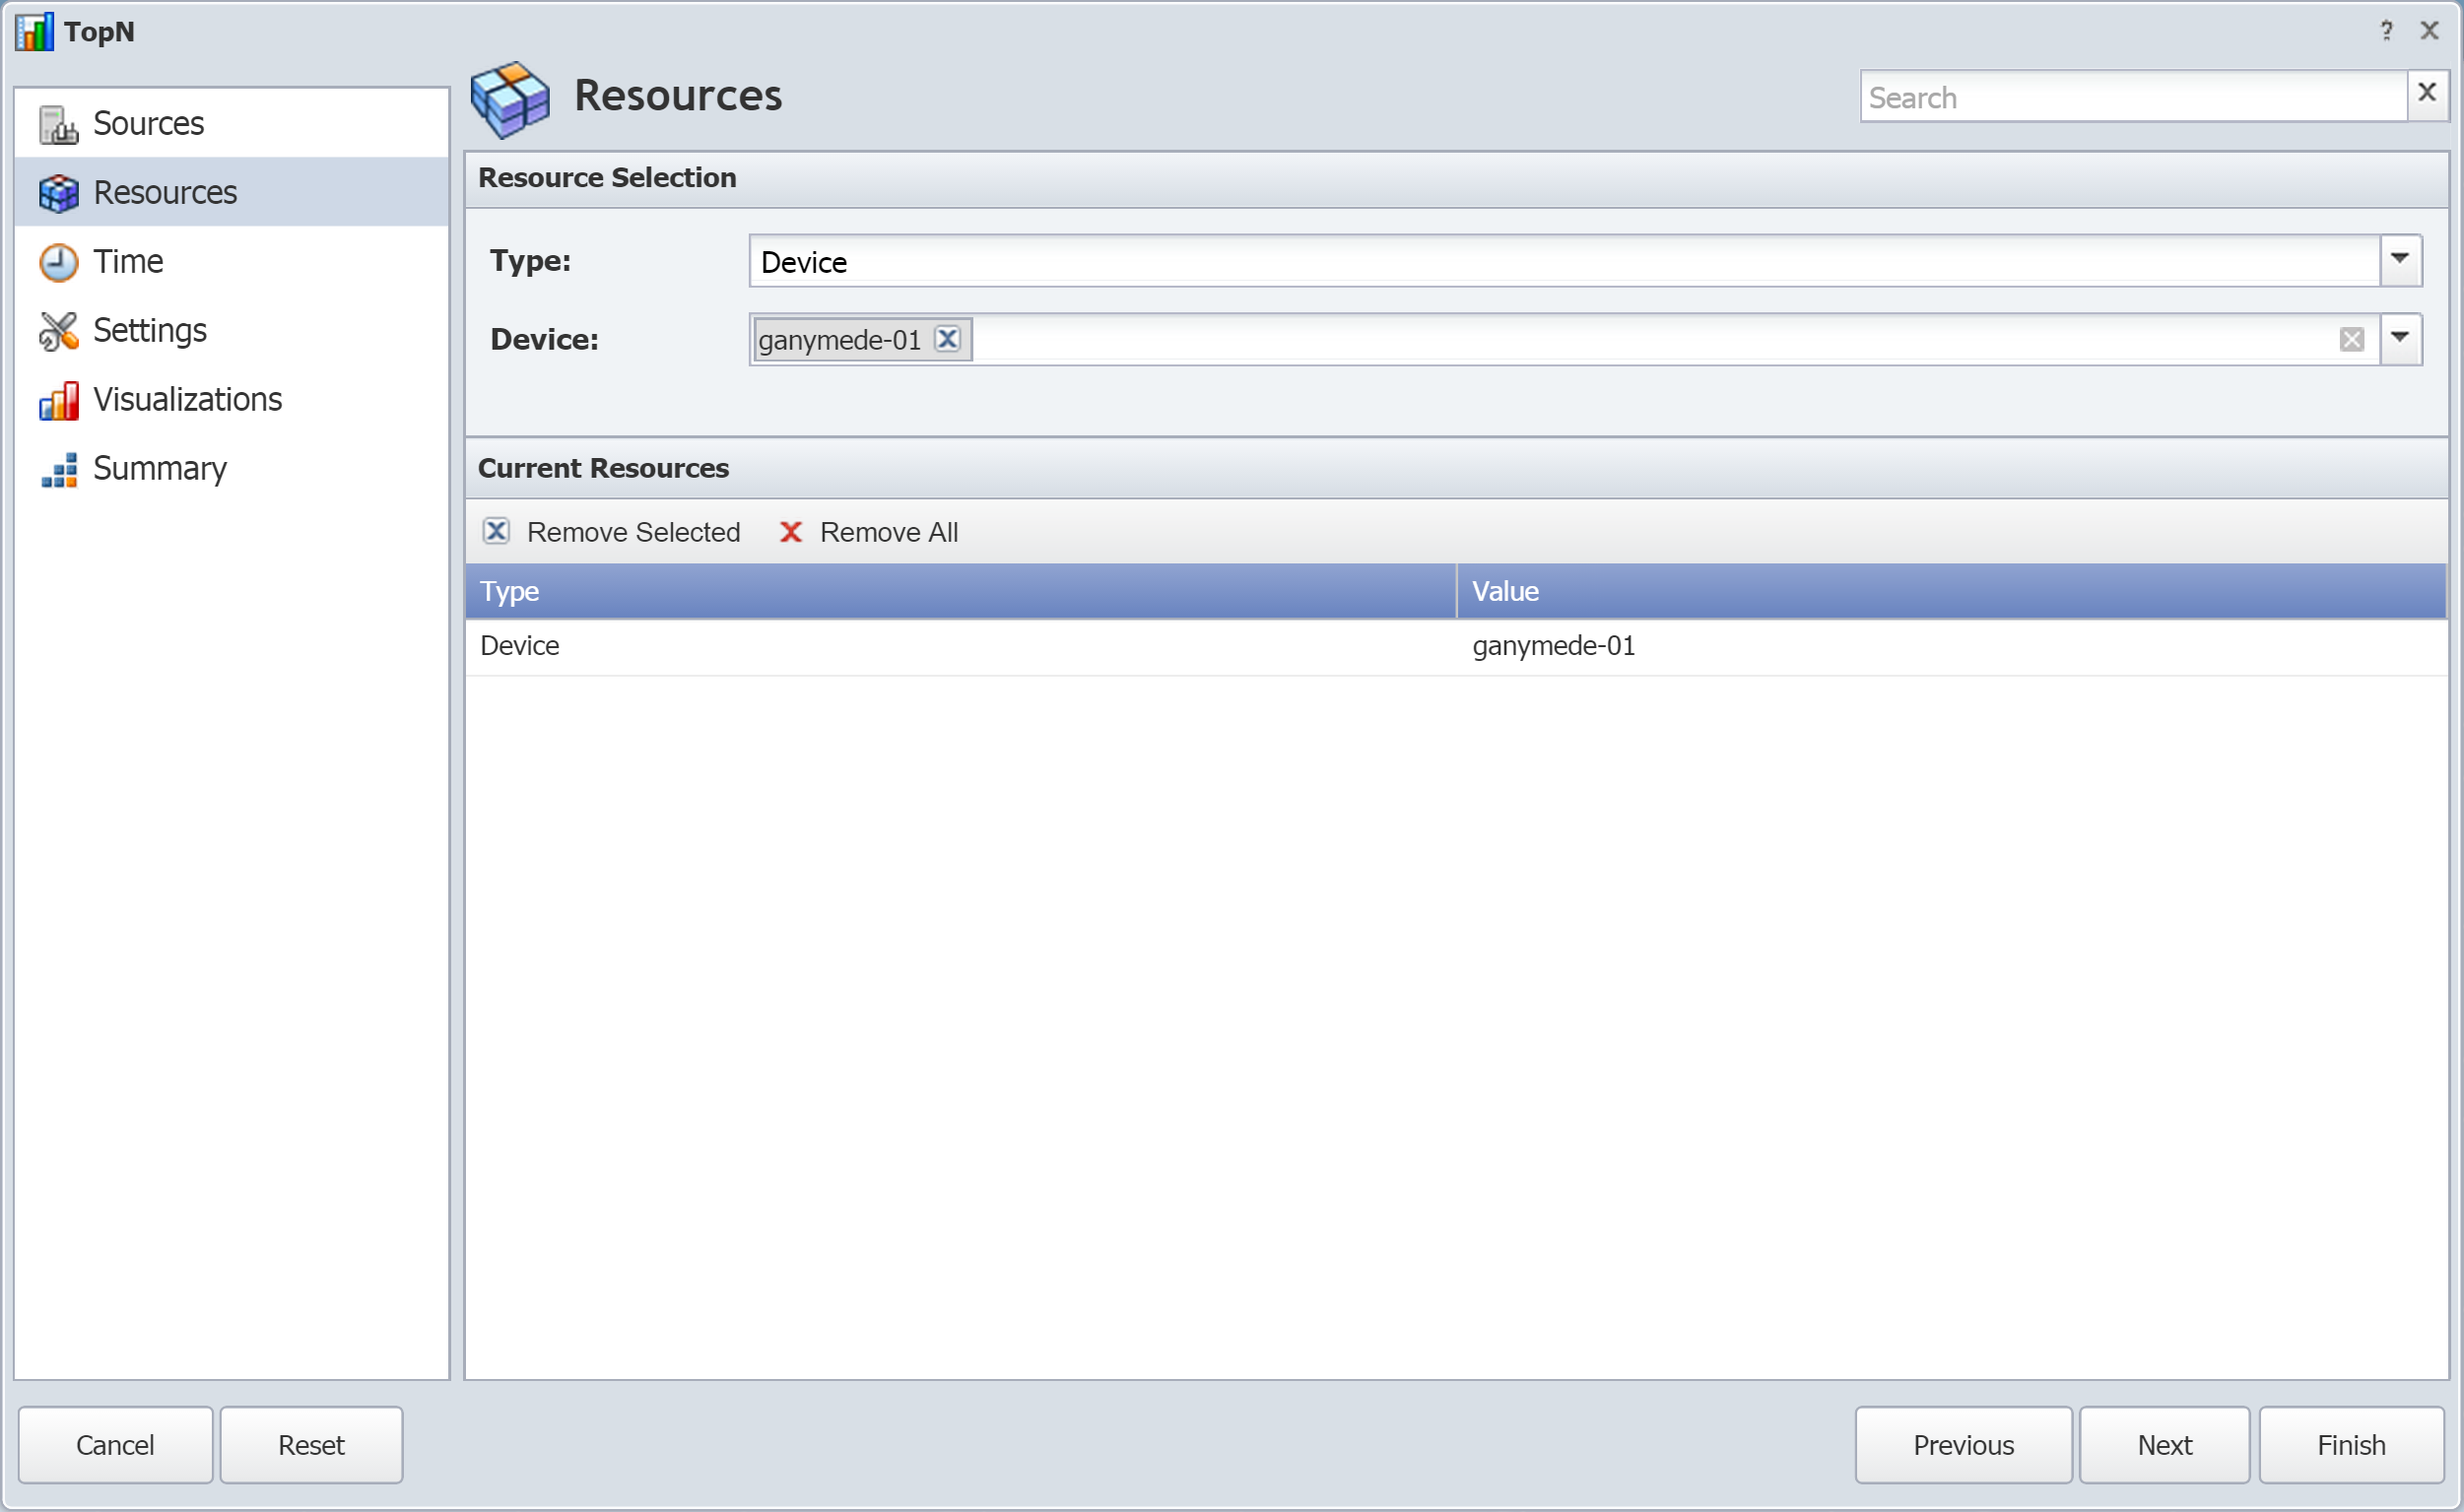
On the Resources page, click the Type drop-down and select Device.
-
Click the Device drop-down and select the device that you edited metadata values for in the previous section.
-
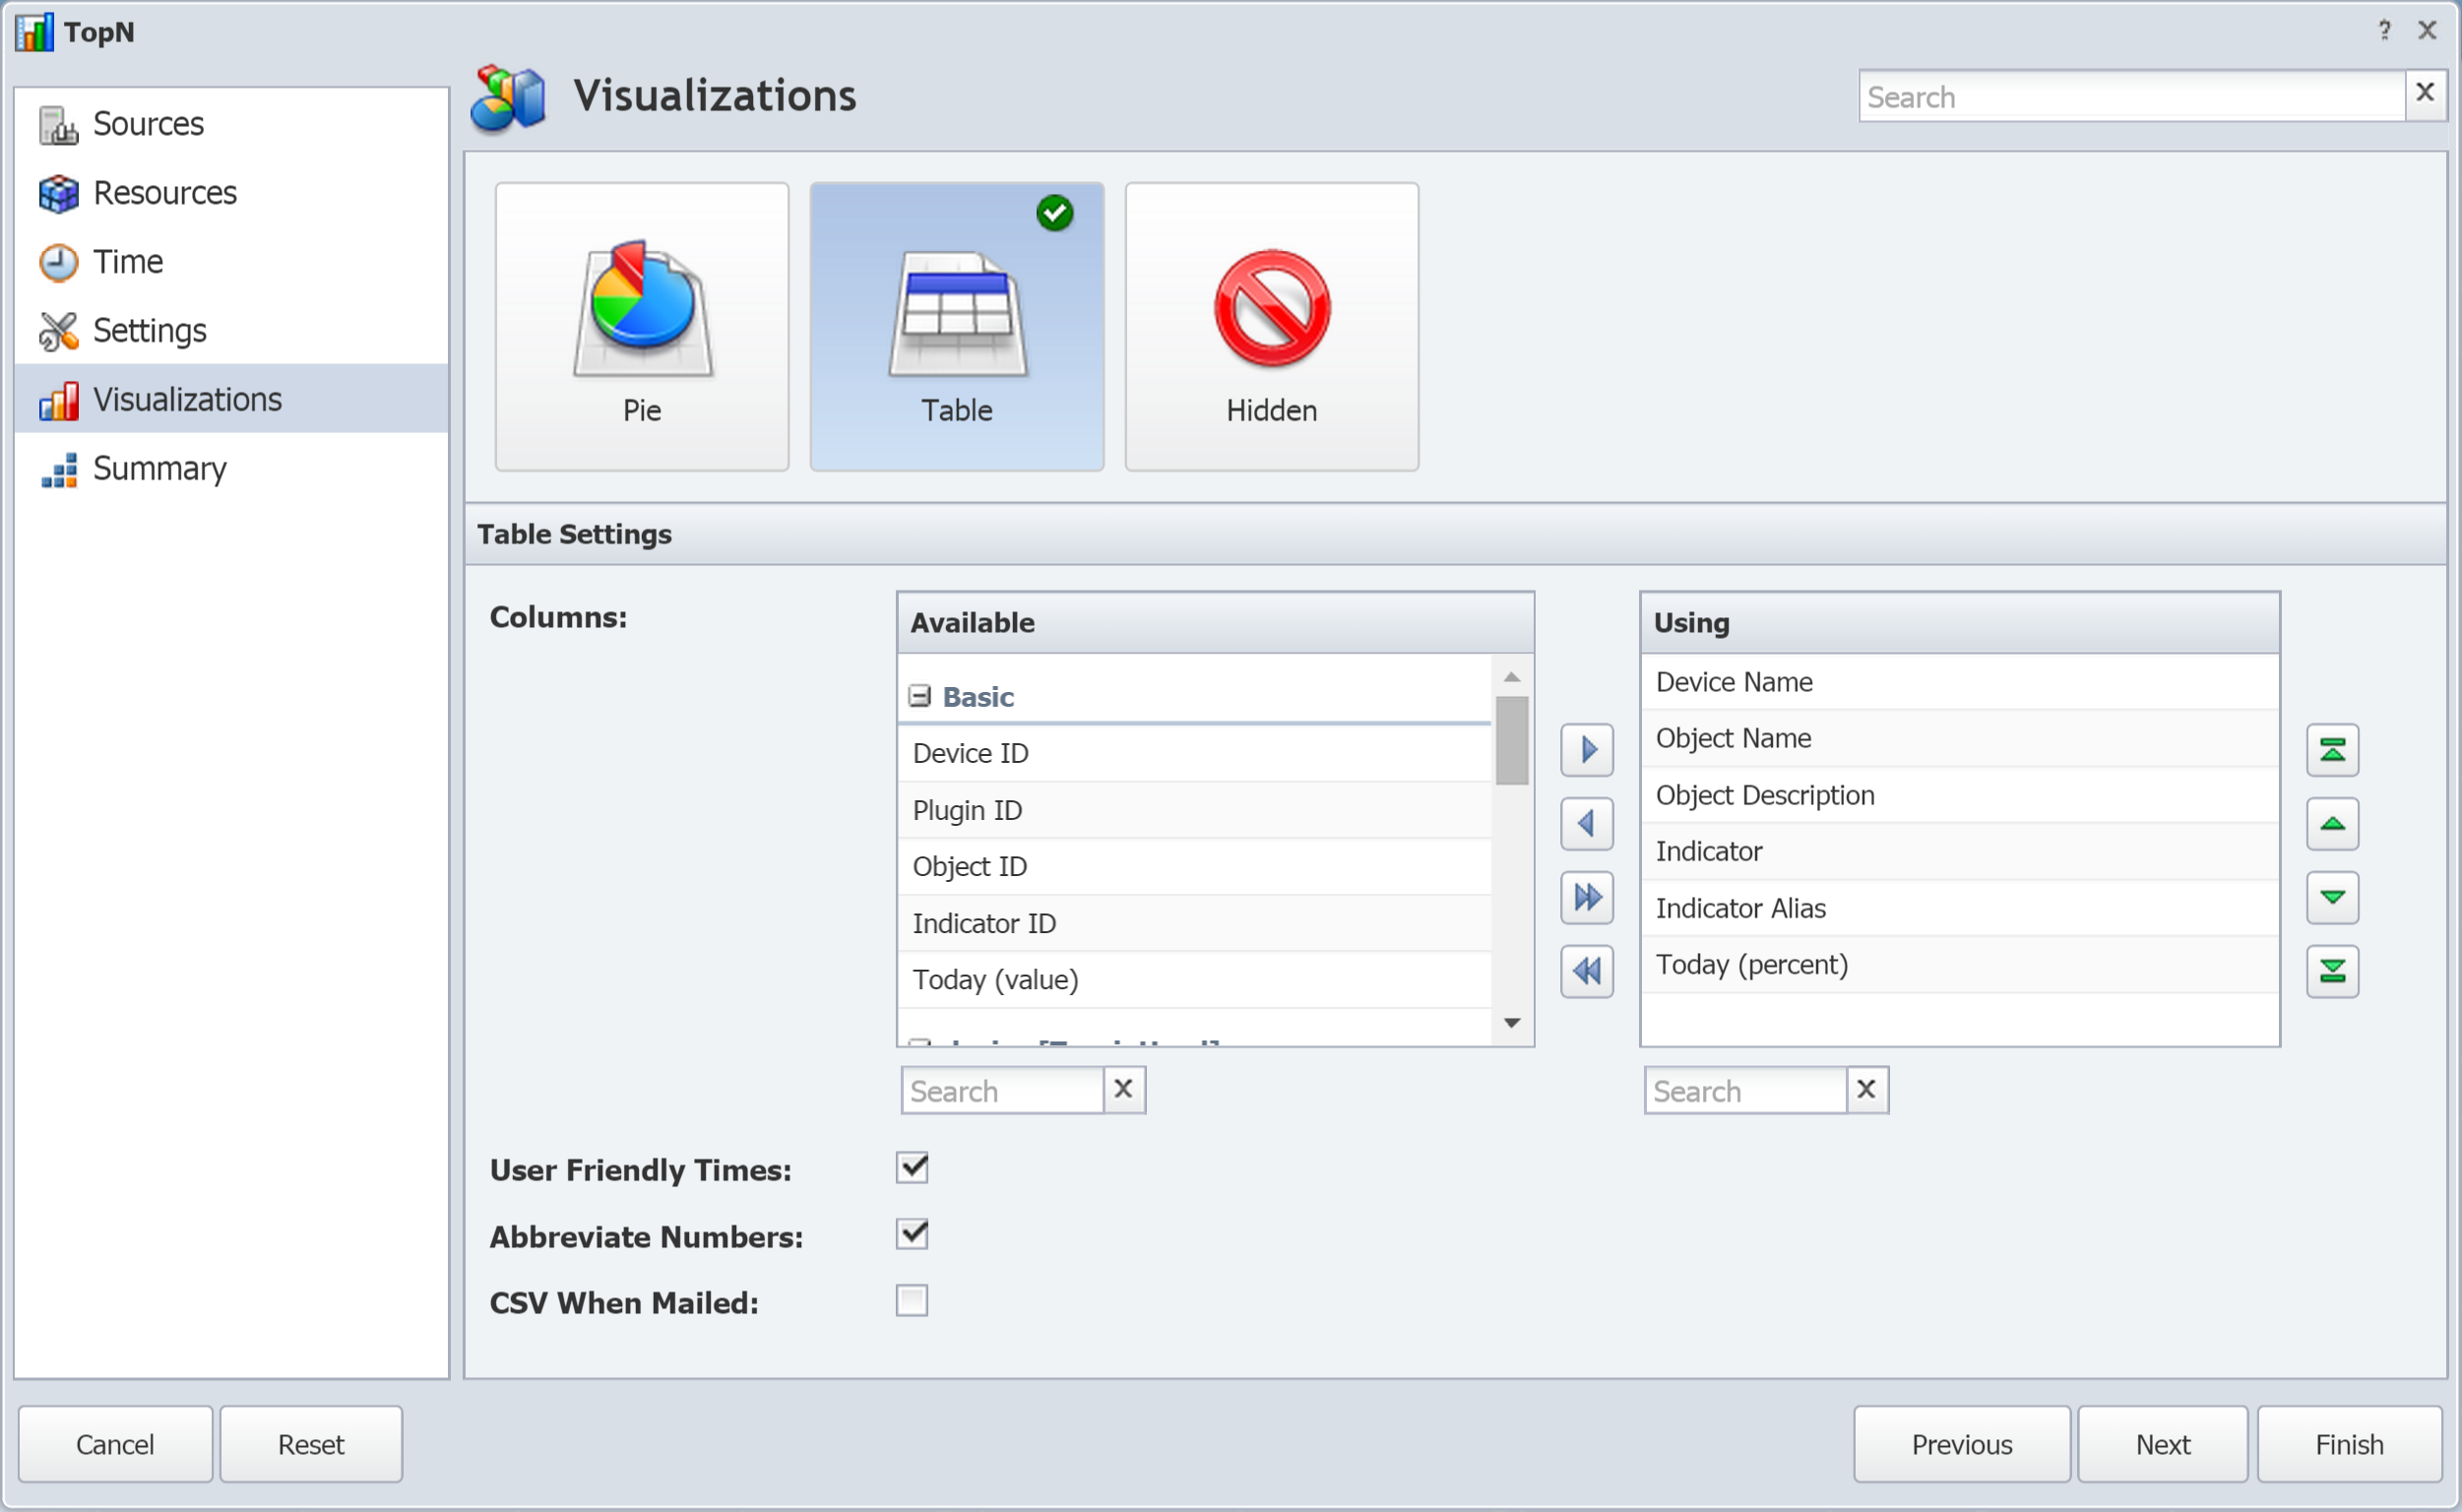
Now jump ahead to the Visualizations page.
-
The Table visualization should be selected by default. If not, select it.
-
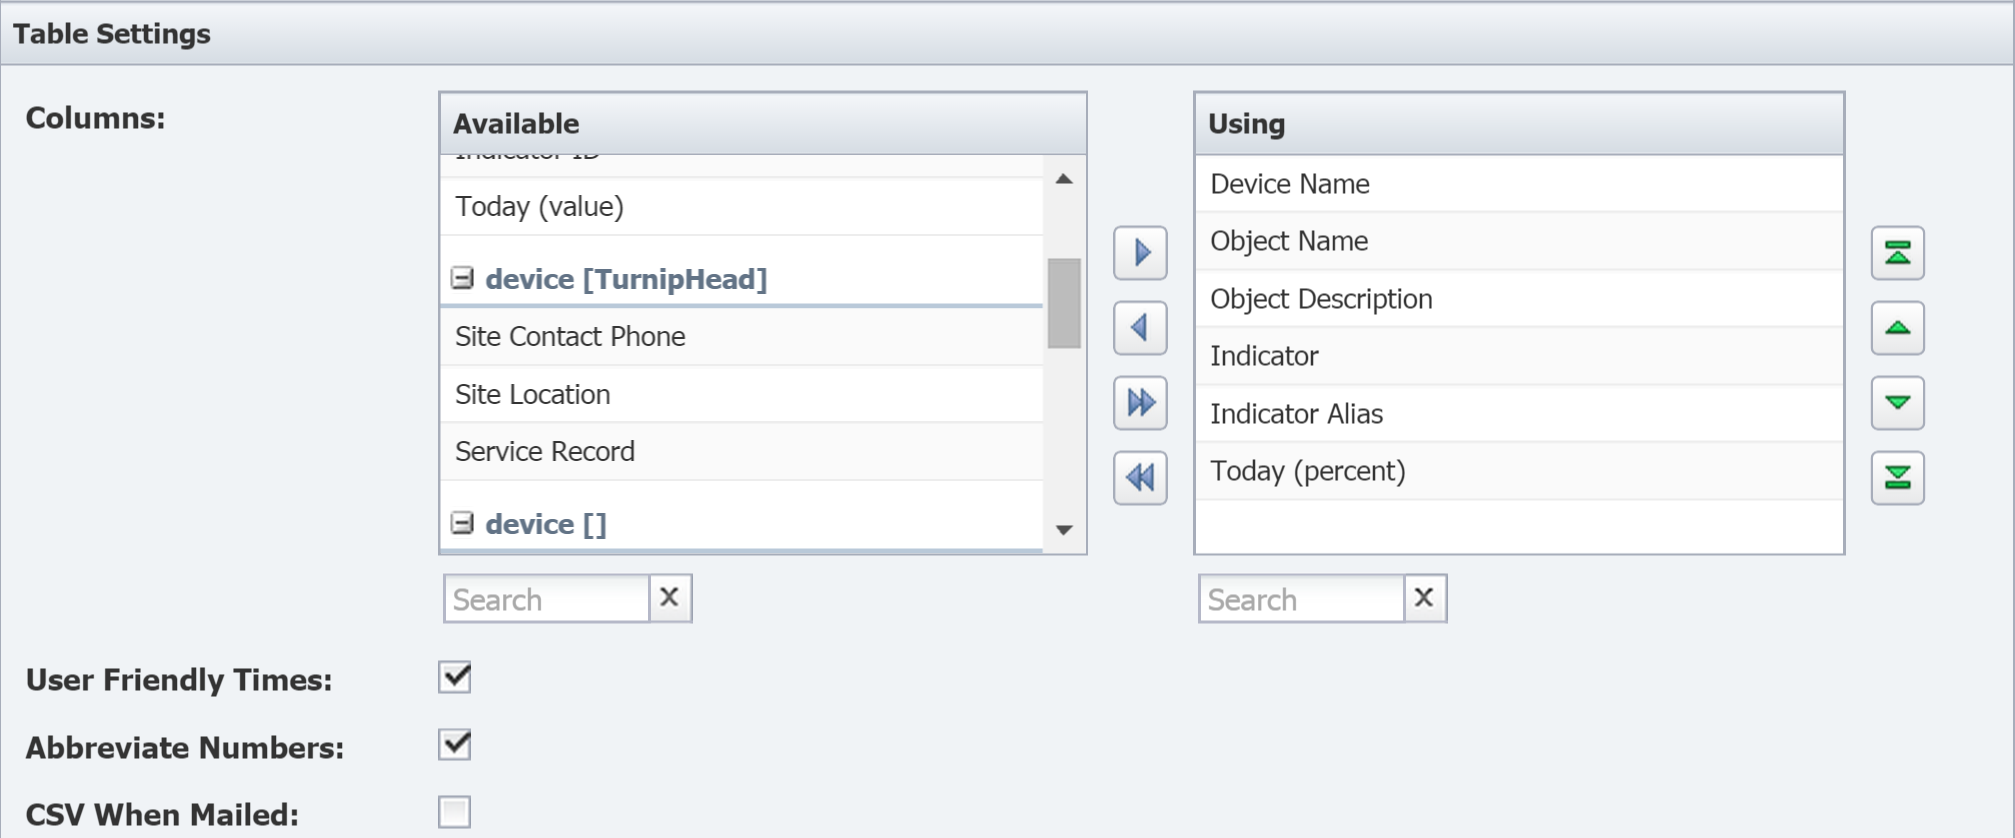
Under Table Settings, you'll see two lists of columns: Available and Using. Under Available, scroll down until you see the namespace you created earlier. Below the namespace, you'll see the namespace's attributes available as columns.
-
Select all of the columns under your namespace: Site Contact Phone, Site Location, and Service Record.
-
Click
 to add the columns to Using.
 -
Now click Finish.
-
Your TopN report results should include a site phone number and coordinates for the location of your device along with a link to the device's service record.
Terms
Attribute - in the context of SevOne NMS metadata, a piece of information that specifies the expected input for a field.
Metadata - data that describes other data.
Namespace - in the context of SevOne NMS metadata, a grouping or collection of metadata attributes.
Target - in the context of SevOne NMS metadata, an area or category where a specific attribute can be used.