
Table of Contents (Start)
SevOne NMS 5.4 Installation Guide
SevOne Documentation
All SevOne user documentation is available online from the SevOne Support website.
-
Enter email address and password.
-
Click Login.
-
Click the Solutions icon.
© Copyright 2015, SevOne Inc. All rights reserved. SevOne, SevOne PAS, SevOne DNC, SevOne PLA, Deep Flow Inspection, and Rethink Performance are either registered trademarks or trademarks of SevOne Inc. Other brands, product, service and company names mentioned herein are for identification purposes only and may be trademarks of their respective owners.
Introduction
The SevOne NMS software is loaded on your appliance. If you provide the IP address of the appliance to your SevOne Sales Engineer this has been entered for you.
This document describes what you must do to get the appliance up and running from the moment you open the box until you are ready to log on to the application. Please see the SevOne Implementation Guide for how to log on, how to build a SevOne cluster, and how to begin your SevOne implementation.
Multi-Peer and Hot Standby Appliance Implementations
The Cluster Manager provides an Integration tab to enable you to build your cluster and to add new appliances as peers into an existing cluster. See the SevOne Implementation Guide for details.
When your new appliance is a Hot Standby Appliance, perform the steps in chapter 2 to rack up and define the Configuration Menu settings then contact SevOne Support to ensure that the Hot Standby Appliance is appropriately implemented.
(Email: support@sevone.com - Phone: +1 302-319-5400)
Create Support Account
SevOne Support is only a phone call away - +1-302-319-5400. Go to www.sevone.com/support and create a user account to enable SevOne Support Engineers to provide support services.
-
In the address field on your web browser enter www.sevone.com/support and press Enter.
-
In the Create New Account section enter the following information.
-
Your Full Name
-
Email Address
-
Phone Number
-
Company
-
-
Click Create Account.
-
Your account is created instantly and SevOne Support reviews the account validity within the next business day.
Rack Up and Connect to Your Network
Perform the following steps to power on your new SevOne NMS appliances and to integrate them into your network.
-
Unpack your SevOne NMS appliance and identify each item.
-
Rail Kit
-
Cable Management Arm (CMA) Kit
-
Faceplate/Bezel
-
Power Cords
-
SevOne NMS Appliance
-
-
Install the appliance into a computer cabinet/rack. See the Rack Installation Instructions booklet located in the Rail Kit box.
Note: You will install the faceplate/bezel in a later step.
-
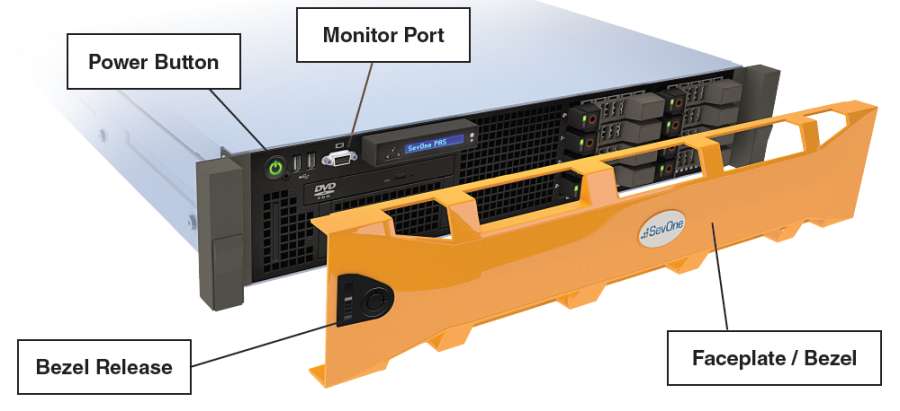
Connect a keyboard and a monitor to the SevOne NMS appliance. Typically you use the connections on the front of the appliance although you can use the connections on the back of the appliance.
Note: If you connect two monitors, only the monitor you connect to the front of the appliance displays.
-
Connect the network RJ45 cable to port GB-1 on the back of the appliance.
Note: There are 4 Ethernet ports labeled GB-1 through GB-4. Use GB-1.
-
Plug in all applicable power cords: two cords for appliance (second for redundancy) one for monitor.
Note: A green light flashes on the back and the network port light flashes but you have yet to power on the appliance.
-
 Press the Power button located on the top left-hand corner on the front of the appliance to power on your SevOne NMS appliance
  and power on the monitor.
-
Wait as the following messages appear when the appliance powers on(~ 3 minutes).
-
Configure Memory
-
BIOS Revision
-
SevOne
-
-
When the "SevOne NMS Version … Configuration Menu" appears, you are ready to proceed.
Appliance Network Configuration
The "SevOne NMS Version … Configuration Menu" enables you to enter your company's network settings onto the appliance. You need the following information:
-
System Name (Host Name)
-
Host IP address and sub-netmask
-
Broadcast address
-
Default Gateway IP address
-
DNS primary & secondary IP address
-
NTP (Time Server) IP address
-
SNMP Settings
-
Domain Name
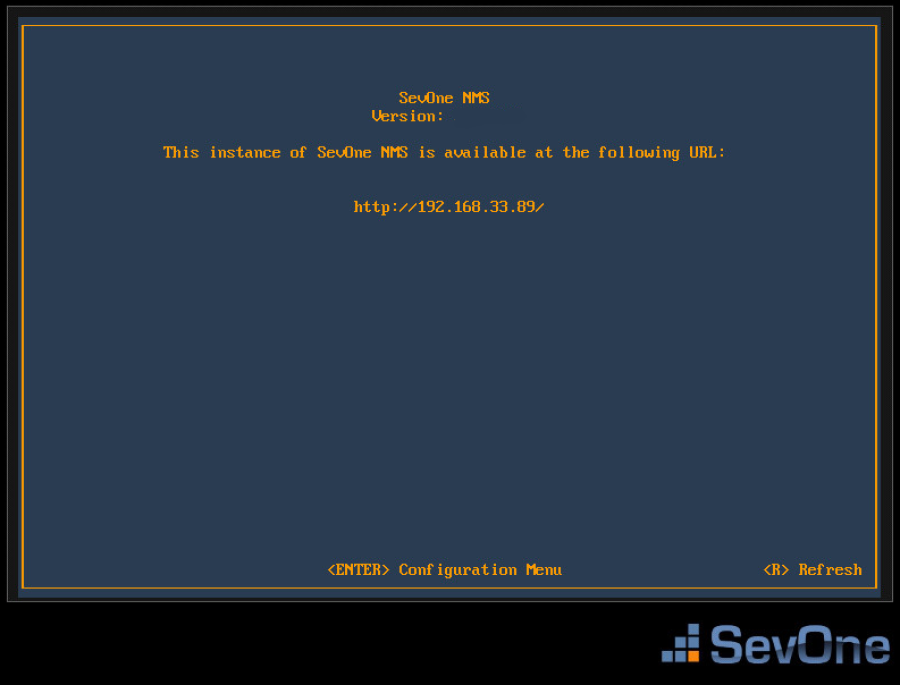
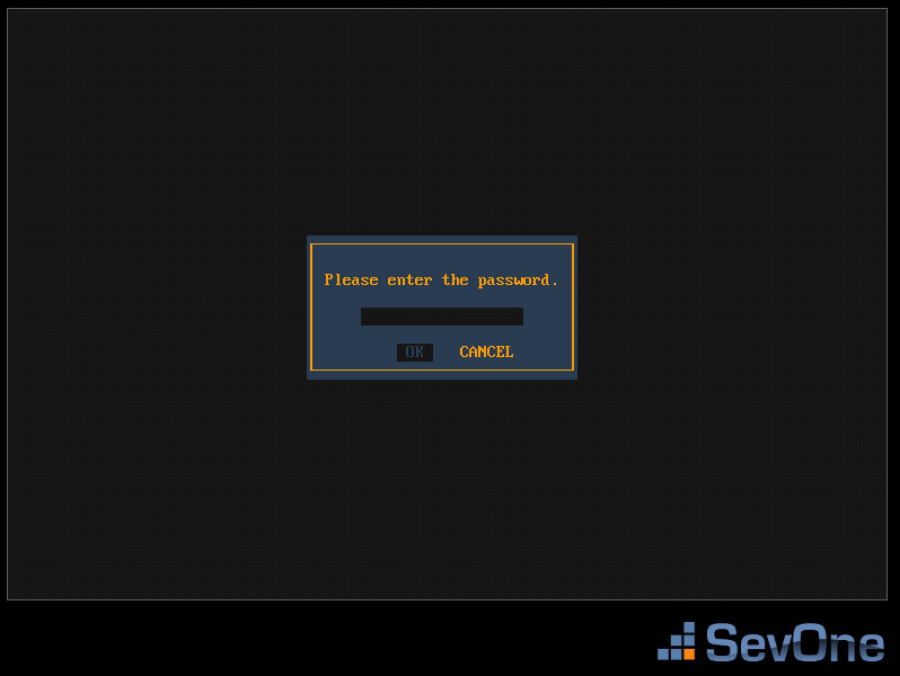
On the first page, press Enter to display the logon page that controls access to the Configuration Menu.
-
Enter the default password: changeme
-
Press Enter to display the system configuration menu.
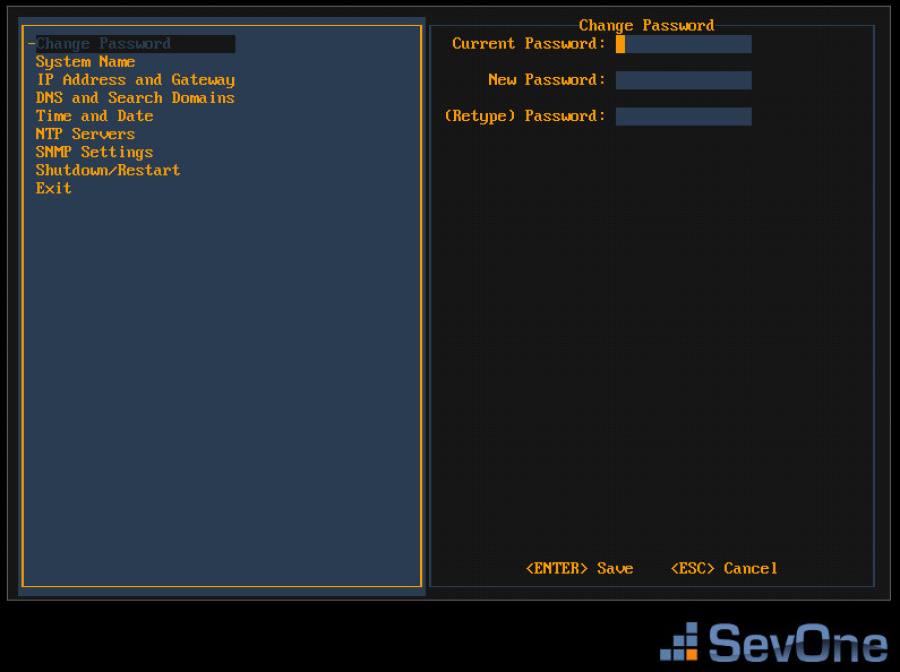
With the Change Password option selected on the left, press Enter to display the Change Password fields on the right.
-
In the Current Password field, enter the current password (SevOne NMS initial default password – changeme) and press Tab.
-
In the New Password field, enter your new password and press Tab.
-
In the (Retype) Password field, enter your new password a second time to confirm.
-
Press Enter to save the Change Password settings and return the focus to the menu on the left.
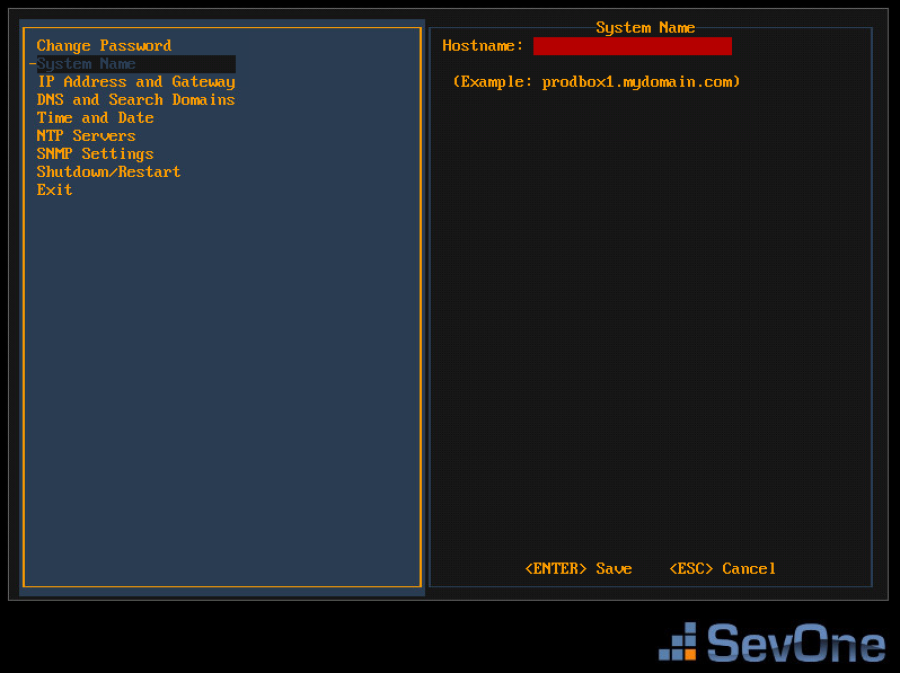
Press the down arrow to select System Name in the left menu and press Enter to display the System Name fields on the right.
-
In the Hostname field, enter the hostname for the SevOne NMS appliance.
-
Press Enter to save the System Name settings and return the focus to the menu on the left.
Press the down arrow to select IP Address and Gateway and press Enter to display the IP address and gateway fields on the right.
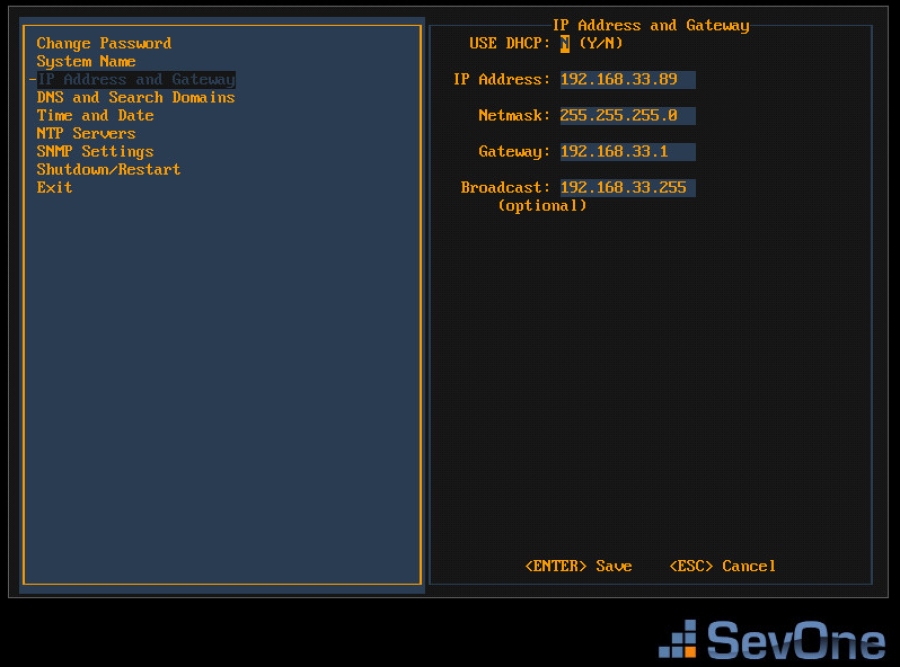
If your network uses DHCP, type Y to disable the following fields and skip the IP Address and Gateway steps. If your network does not use DHCP, type N and complete the following fields.
-
In the IP Address field, enter IP address of the SevOne NMS appliance and press Tab.
-
In the Netmask field, enter the netmask of the SevOne NMS appliance and press Tab.
-
In the Gateway field, enter the IP address of the SevOne NMS appliance and press Tab.
-
In the Broadcast field, enter the SevOne NMS broadcast IP address.
-
Press Enter to save the IP Address and Gateway settings and return the focus to the menu on the left.
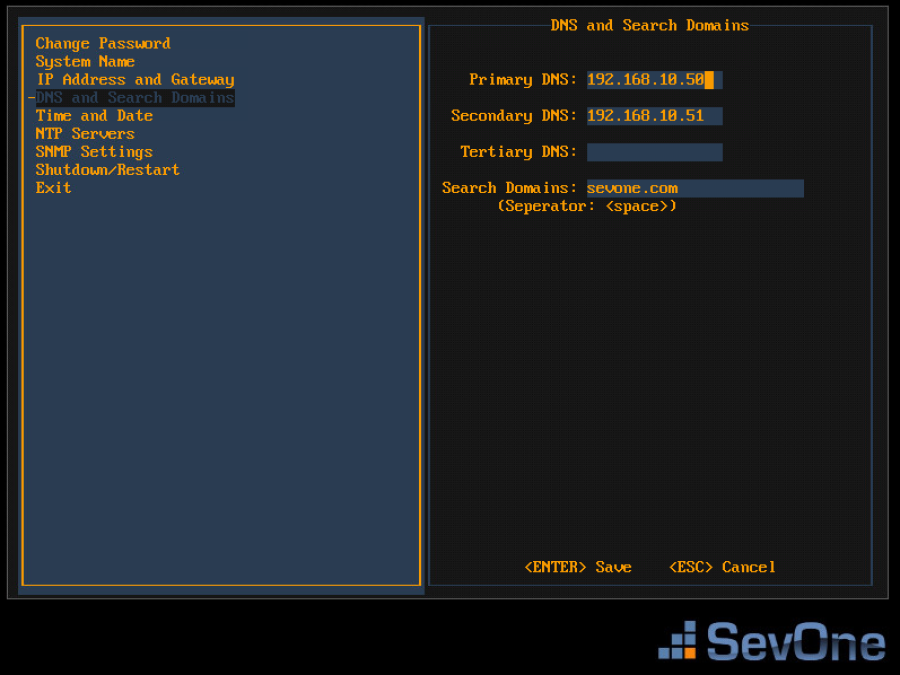
Press the down arrow to select DNS and Search Domains and press Enter to display the DNS and Search Domains fields on the right.
-
In the Primary DNS field, enter the IP address of the DNS server for SevOne NMS to use first and press Tab.
-
In the Secondary DNS field, enter the IP address for SevOne NMS to use second, if applicable and press Tab.
-
In the Tertiary DNS field, enter the IP address of the DNS server for SevOne NMS to use third, if applicable and press Tab.
-
In the Search Domains field, enter the domain names or IP addresses for the search domains for SevOne NMS to use (separated by a space).
-
Press Enter to save the DNS and Search Domains settings and return the focus to the menu on the left.
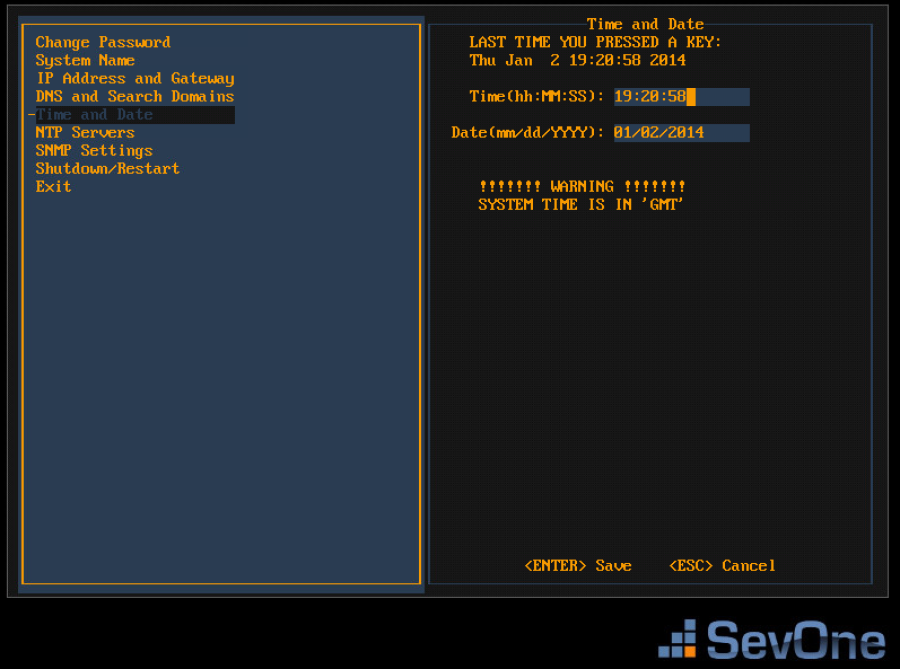
Press the down arrow to select Time and Date and press Enter to display the Time and Date fields on the right.
-
Confirm that the time and date are correct for Greenwich Mean Time (GMT) (a.k.a. Coordinated Universal Time (UTC)). This is the SevOne NMS system time. You define time and date settings for users, devices, and reports via the SevOne NMS GUI in a later step.
-
If needed, enter the time and date using the appropriate format in the fields provided.
-
Press Enter to save the Time and Date settings and to return the focus to the menu on the left.
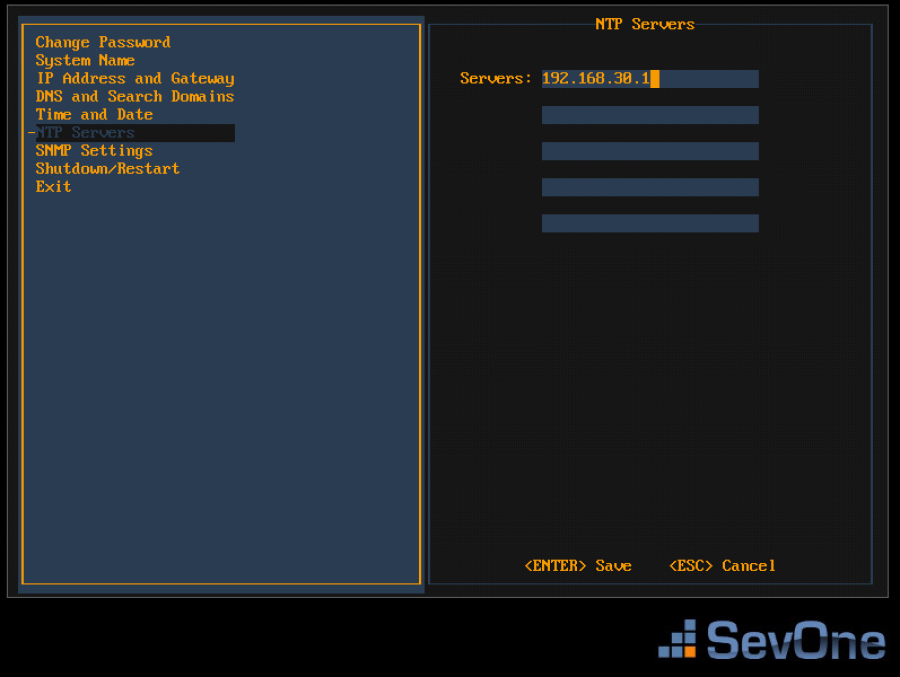
Press the down arrow to select NTP Servers and press Enter to display the NTP Servers fields on the right.
-
In the Servers field, enter the DNS name or IP address of the time server for SevOne NMS to use to maintain time settings.
-
Press Enter to save the NTP Servers settings and to return the focus to the menu on the left.
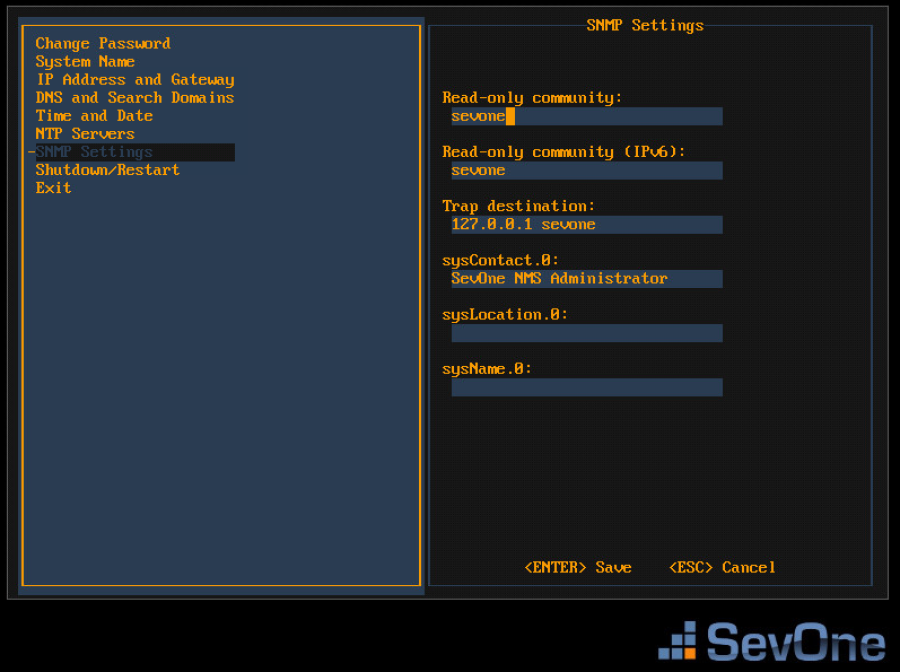
Press the down arrow to select SNMP Settings and press Enter to display the SNMP Settings fields on the right.
-
In the Read Only Community field, enter the SNMP read community string for other devices to use to poll SNMP data on this appliance when communicating via IPv4 and press Tab.
-
In the Read Only Community (IPv6) field, enter the SNMP read community string for other devices to use to poll SNMP data on this appliance when communicating via IPv6 and press Tab.
-
In the Trap Destination field, enter the IP address or hostname of the destination where traps this appliance generates are to be sent and press Tab.
-
In the sysContact.0 field, enter the text you get when you SNMP walk the sysContact OID and press Tab.
-
In the sysLocation.0 field, enter the text you get when you SNMP walk the sysLocation OID and press Tab.
-
In the sysName.0 field, enter the text you get when you SNMP walk the sysName OID.
-
Press Enter to save the SNMP Servers settings and to return the focus to the menu on the left.
If you changed the System Name settings or the IP Address and Gateway settings, press the down arrow to select Shutdown and Restart and press Enter to display a Shutdown option and a Reboot option on the right.
For all other configuration setting changes, you can press the down arrow to select Exit.
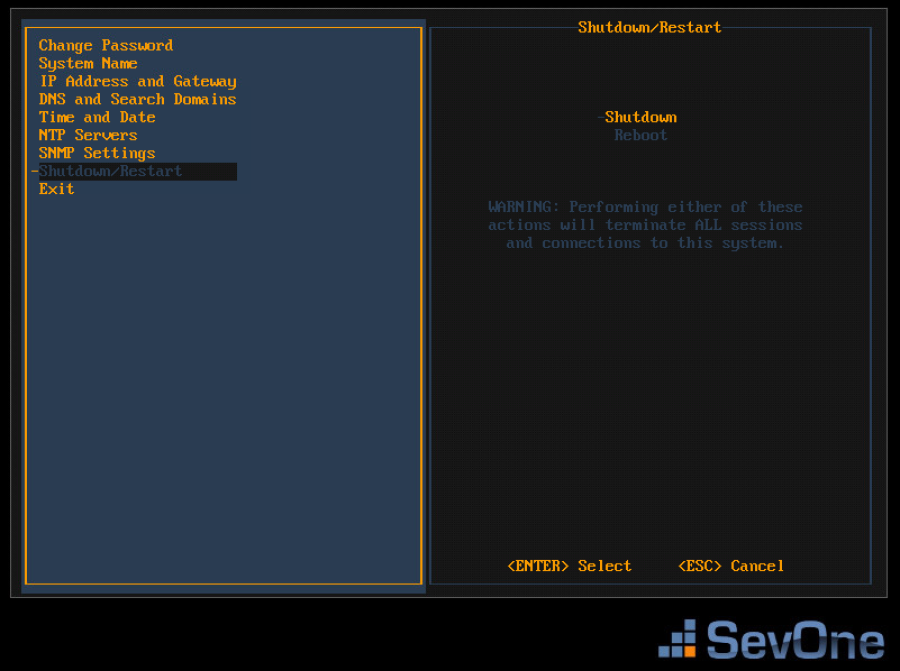
In the Shutdown/Restart section select an option and press Enter to shut down or reboot the SevOne NMS appliance.
If you select Exit, when you press Enter the initial Configuration Menu Welcome page appears.
You can now disconnect the monitor, disconnect keyboard, and install the SevOne faceplate/bezel.
Shut Down and Reboot SevOne NMS
SevOne NMS can run for extended periods of time. Occasionally it is necessary to shutdown or reboot an appliance. SevOne NMS stores data in cache and writes to the disk on a regular basis. The following shell commands back up the memory ring tables to the database on the disk to ensure that you do not lose data.
To shutdown SevOne NMS:
SevOne-shutdown shutdown
To reboot SevOne NMS:
SevOne-shutdown reboot